If I have used AI in any way to produce a piece for my website, I always mention that fact and will often elaborate on how I have done so. Occasionally, I will also talk about the use of AI to help readers expand their understanding of what it’s all about.
I did none of those things in my last piece about our Thanksgiving weekend getaway to Niagara-on-the-Lake. And yet, I used AI frequently and in several different ways to edit the images that appeared in that post. The reason I didn’t mention it was that I was setting things up to discuss it in some depth in this article. And this post is all about “photo editing”.
To begin with, I think I should explain what I mean by photo editing. As far as I’m concerned, it’s taking an original photograph or image and changing it, either slightly or significantly, so that the revised version is different from the original. Pretty straightforward.
I use the term “photo editing”, but you may also have heard it referred to as photo retouching, photo manipulation, Photoshopping or photo enhancement.
For the purposes of this post, I’m not talking about photo or “image creation” from scratch. I’ve done that before using AI chatbots, and you may well have seen some of those creations. My favourite is below.
In these situations, I provide instructions, referred to as a prompt, to the AI agent, telling it what I’m looking for. It then spits out a finished product, which I can have the AI agent alter further to meet my specifications.

For this exercise, I’m going to get into the details of how I edited several photographs. I think you might enjoy this because it’s the sort of thing you can probably do yourself on your home computer, tablet or phone.
Is This a New Thing Related to the Development of AI?
Photo editing is definitely not a new thing. In fact, it has been going on since the 1800s.
From Google:
“1856: Gustave Le Gray’s Combination Prints
By seamlessly combining two separate glass-plate negatives—one exposed specifically for the sky and the other for the sea—Le Gray bypassed the era’s technology limitations. His work is considered one of the earliest examples of successful photographic composition.”
Le Gray typically printed two negatives on a single sheet: one exposed for the sky and the second for the sea. Often, the photographs were taken on different days or in different locations.
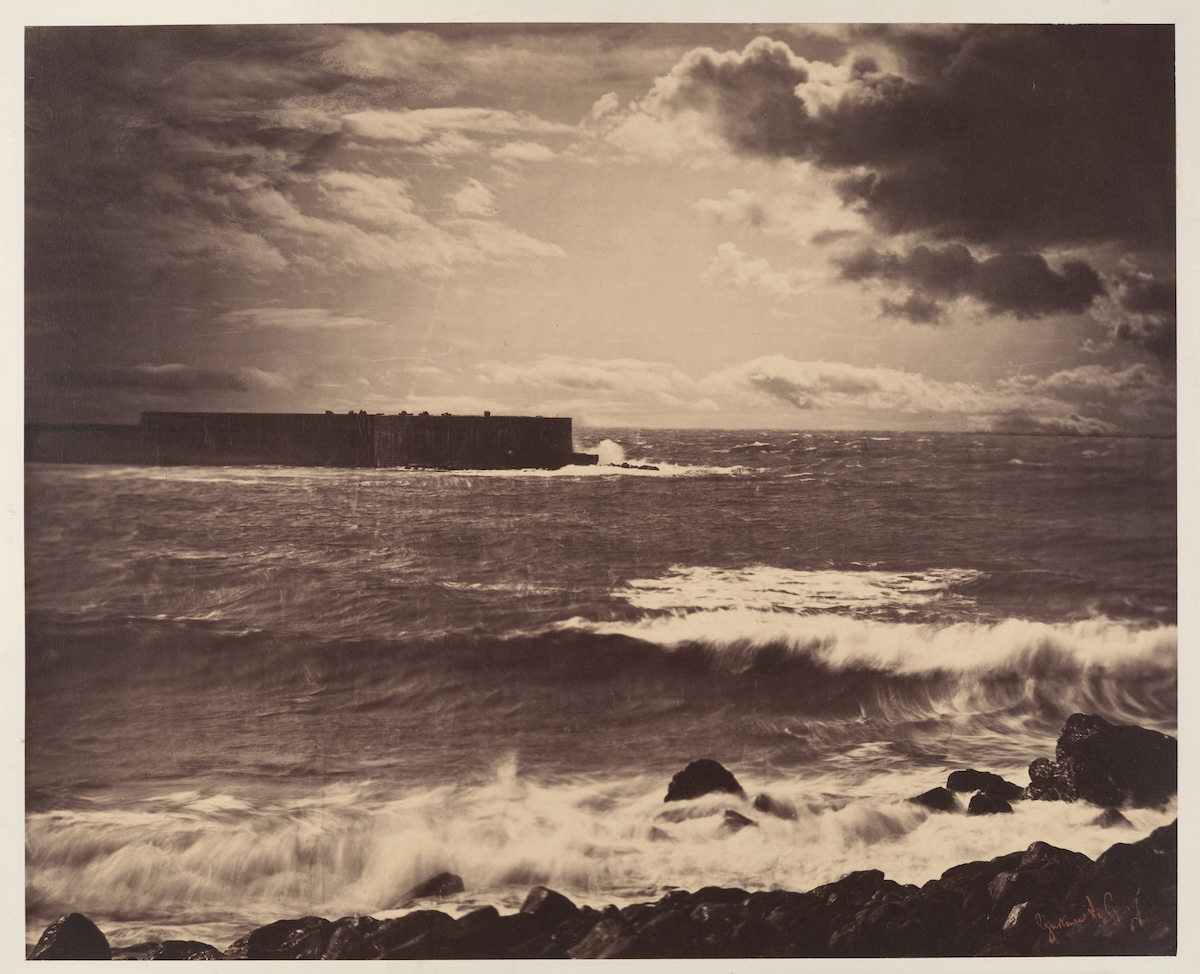
Photo Editing in the Digital Age
With the advent of computers and the development of specialized software, digital photo editing has become commonplace among photographers. And by photographers, I mean just about everyone who owns a cellphone and takes pictures with it.
I think it’s safe to say that most home computers, tablets and cellphones now offer the ability to take and edit photographs, ostensibly with the aim of improving the finished product. If you simply crop a photograph to focus more closely on its important elements, you’ve undertaken photo editing.
Digital photo editing software was first conceived and developed in 1987, when Thomas and John Knoll began working on the program that would eventually become Adobe Photoshop. In 1988, Adobe Systems licensed the software distribution rights from the Knoll brothers. In 1990, Photoshop 1.0 was officially released for Macintosh computers, marking the commercial takeoff of software-based photo editing. Before Photoshop, specialized high-end digital retouching systems were already being used in professional broadcast and graphic environments during the 1980s.
Today, some form of photo organization and basic editing software typically comes with all the major operating systems. Examples include Microsoft Photos, Apple’s Photos and Google Photos.
The point is that virtually everyone now has access to technology capable of editing photographs. And I don’t think it’s too much of a stretch to say that many of us are doing it quite regularly.
My Own Photo Editing
So, how did I edit the photographs for my last piece about Niagara-on-the-Lake? Did I use conventional editing software, or did I use an AI chatbot? To tell you the truth, I used both. And sometimes I used both to alter the same photograph.
Here we go!
Using AI to Change the Sky
When we arrived in NOTL, it was a lovely day. However, when we came outside after lunch, the gray skies had rolled in. When I looked at the outdoor pictures I had taken that first day, I realized that every one of them had a rather drab, gray sky in the background.
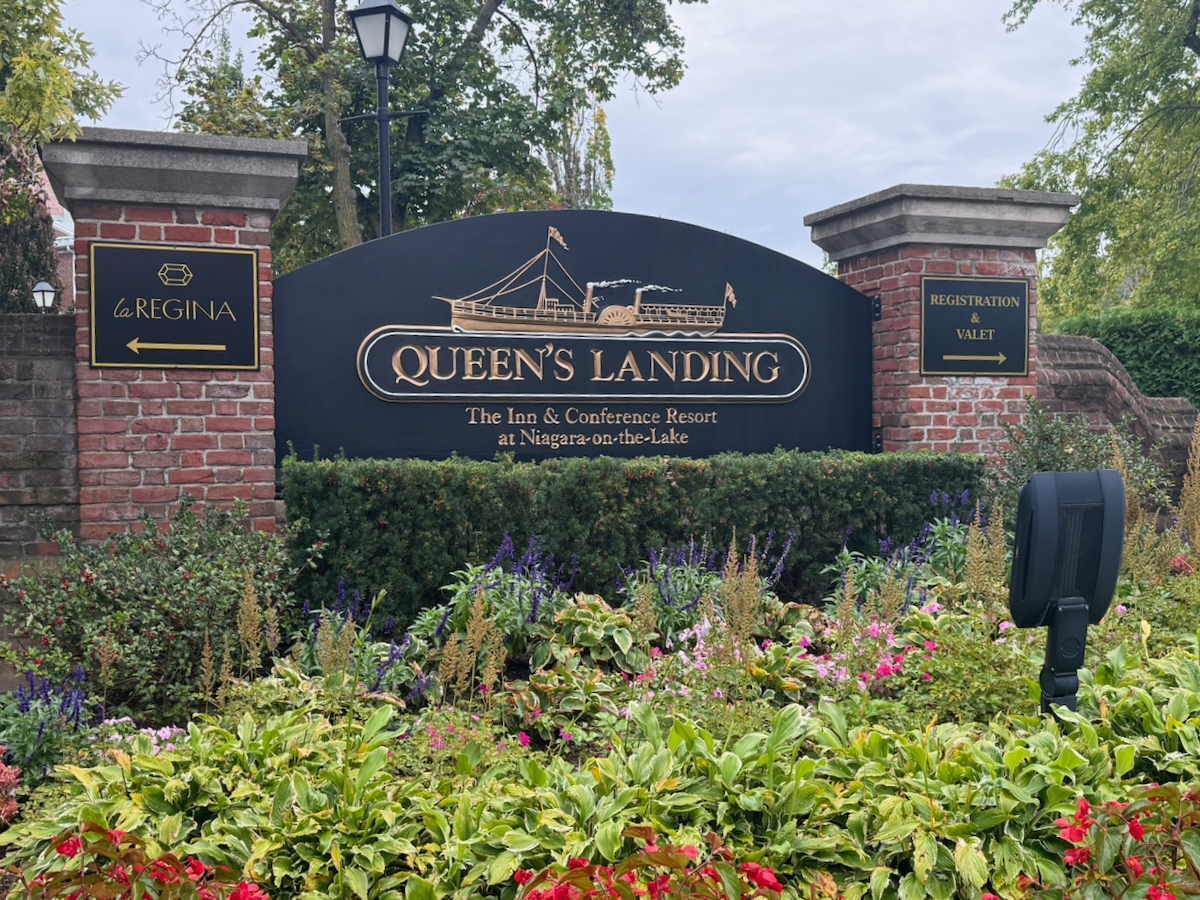
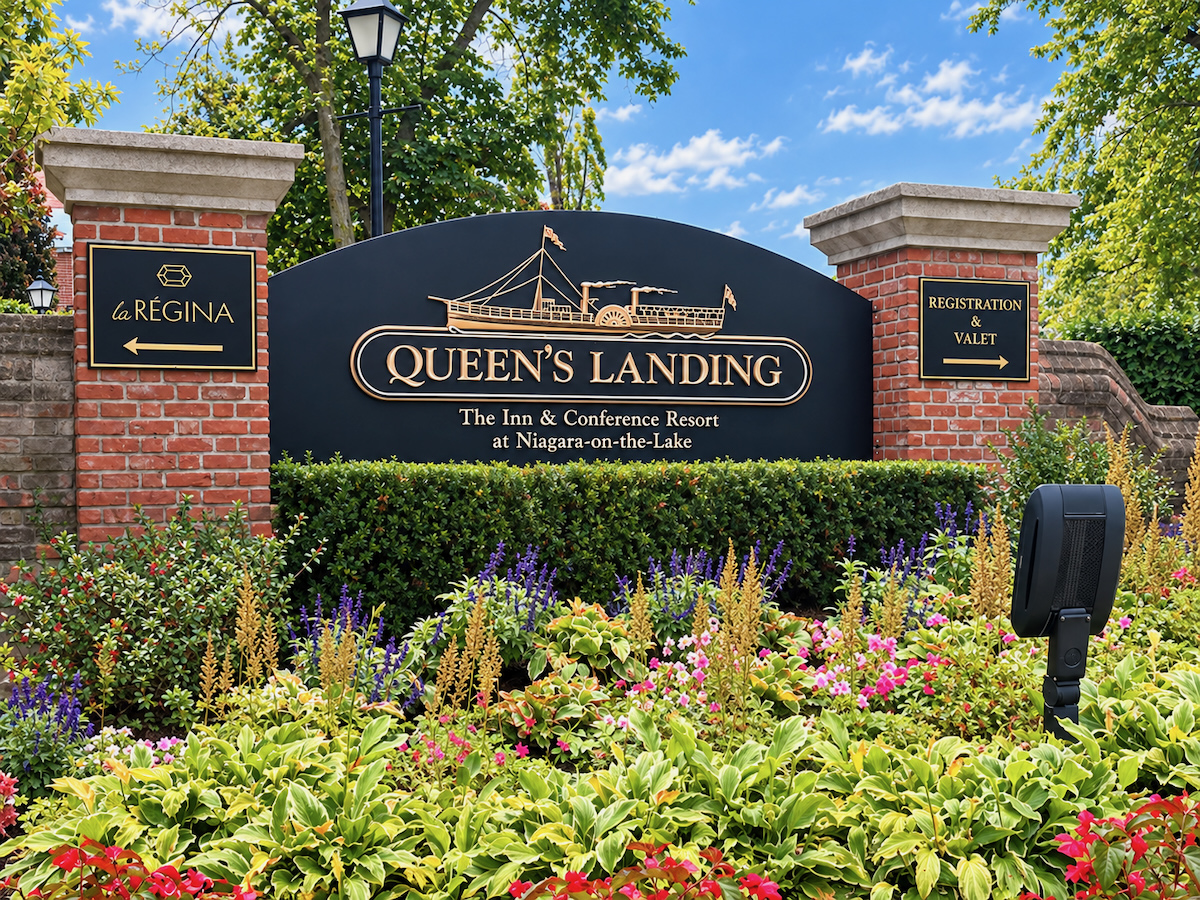
But I was pretty confident that my new best friend, ChatGPT, could change all that for me. So, I uploaded my photograph of the Queen’s Landing Hotel and gave it the following prompt:
“Please alter the following image to eliminate the gray sky and replace it with a generally blue sky with some clouds.”
And here you go: the before and after photographs. As you can see, it did exactly what I wanted. In fact, it went a little further by brightening up the entire scene, presumably understanding that if it’s a bright, sunny day, everything else should look a little brighter as well.

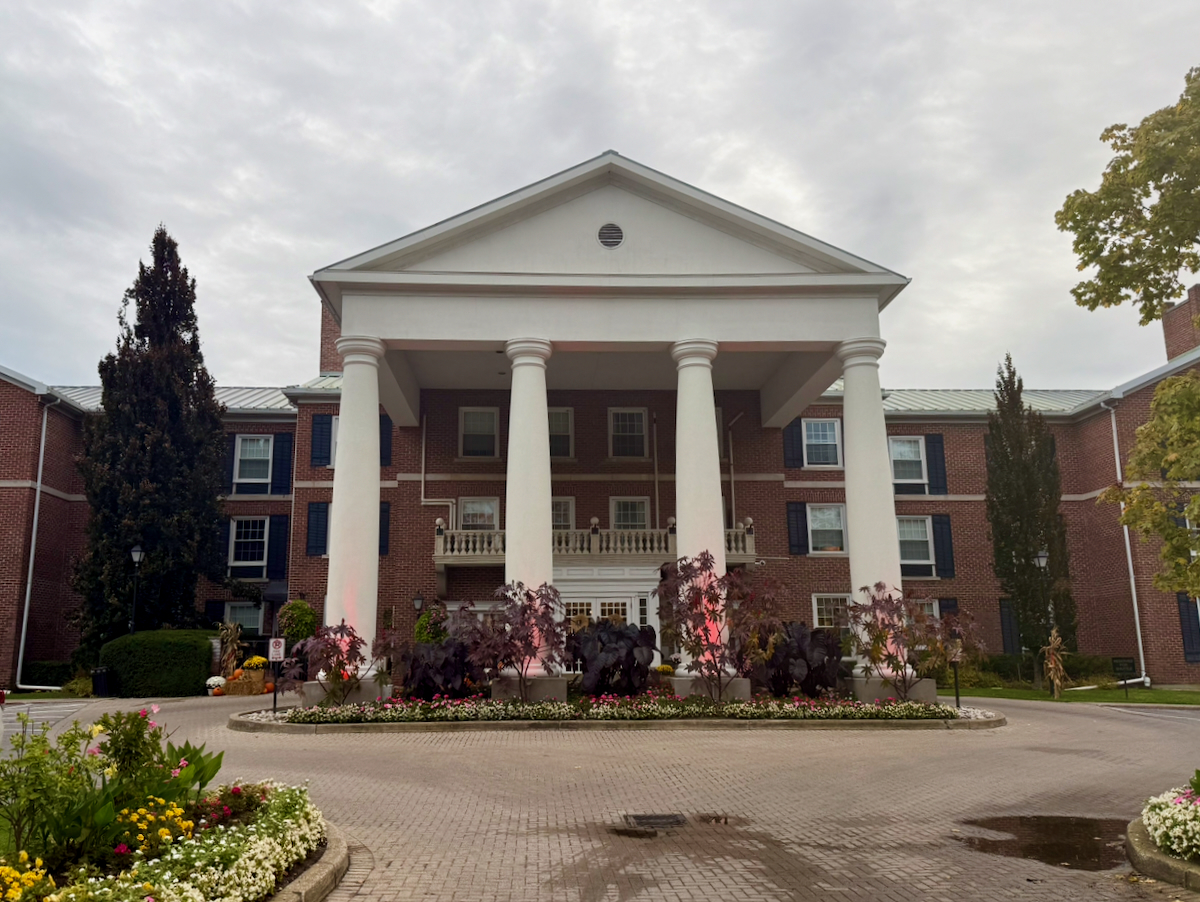
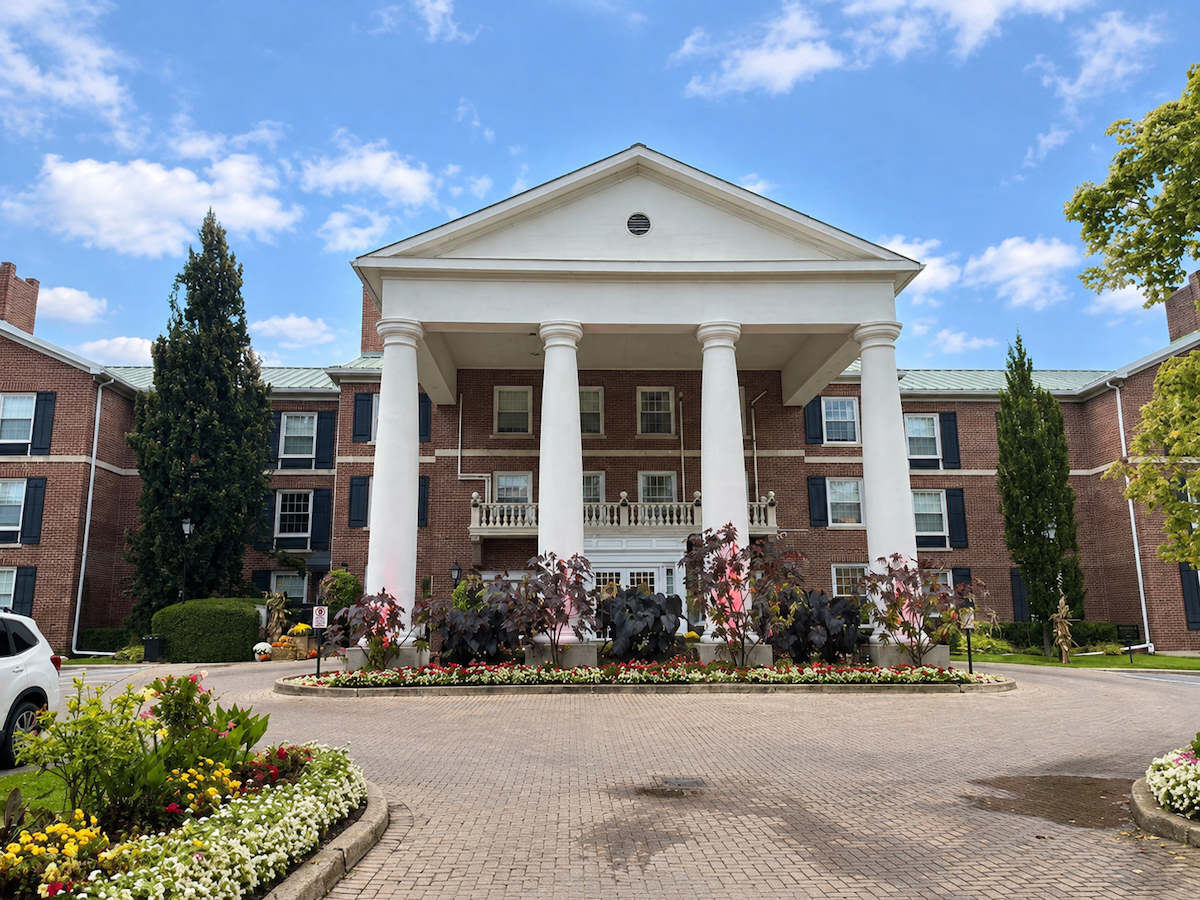
It does need to be pointed out that this isn’t some sort of exclusive AI magic. We’ve been able to change the background skies in photographs around the release of Adobe Photoshop 3.0 in 1994.
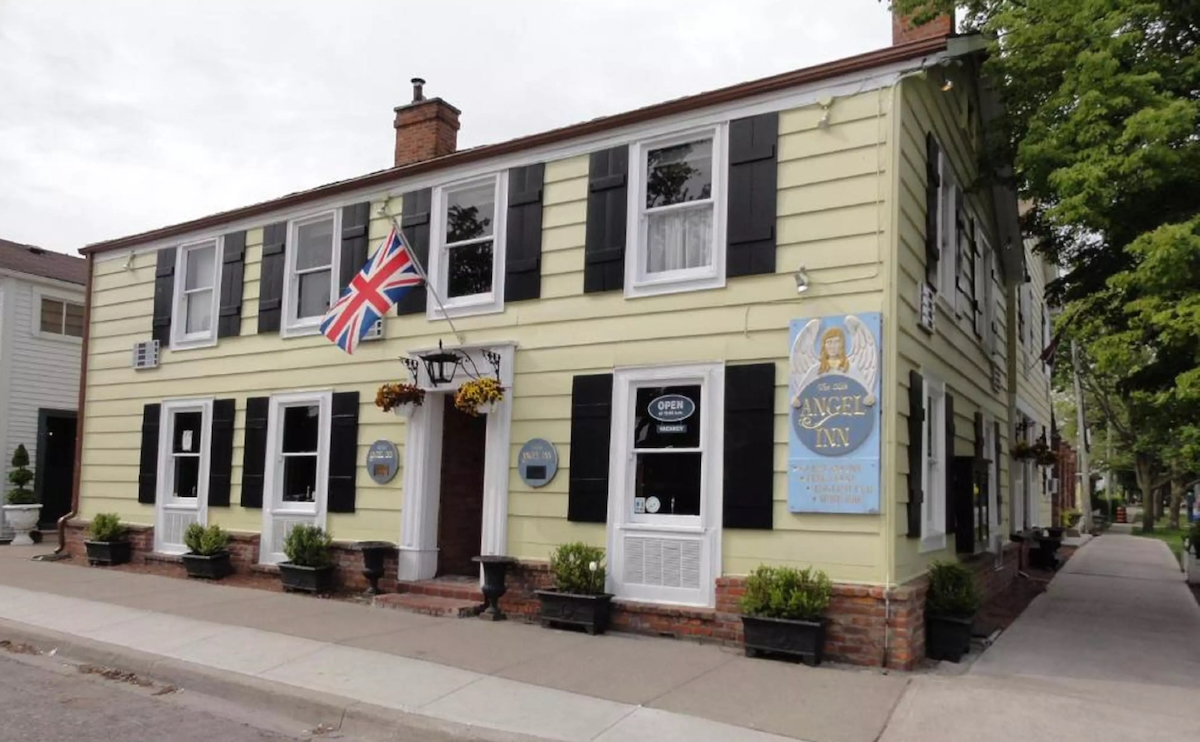
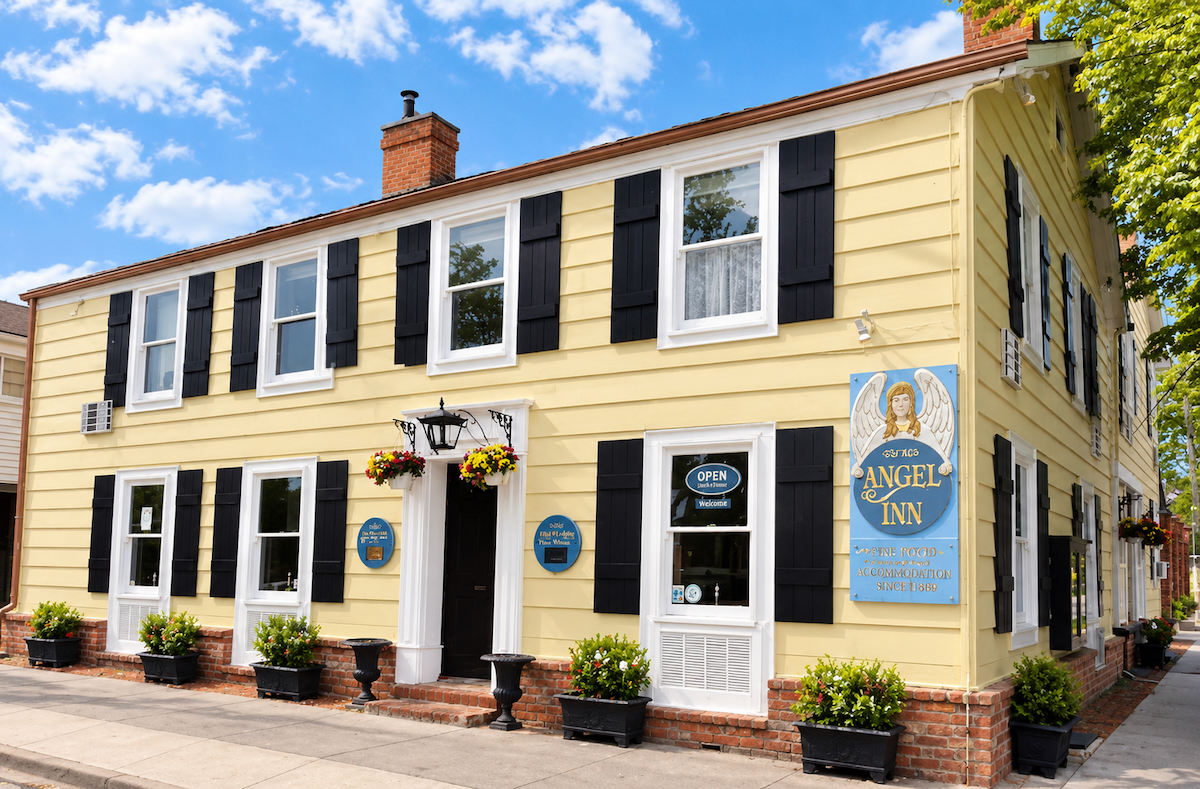
And, in the interest of full disclosure, here are the before and after photographs of most of the other images in which I changed the sky.
Using AI to Clean Up Text
You may think I’m busy taking photographs all the time, given the number you’ve seen in my various posts. That’s not the case. Most of the time, I’m not, unless I think I might be putting together a blog post about the experience.
Even then, I sometimes forget to take pictures of important things. Our dinner at the Prince of Wales Hotel was one such occasion. I completely forgot to take photographs of the menu and the separate three-course offering that I ultimately selected.
When we left the hotel to head home, I noticed that both menus were on display in a glass-topped box outside the front door. I was shooting through glass, at night, so the results weren’t exactly ideal. These first two photographs show you what my original images looked like.
Click on the left image in photo carousels and they will pop up into a larger, easier-to-view and read format.
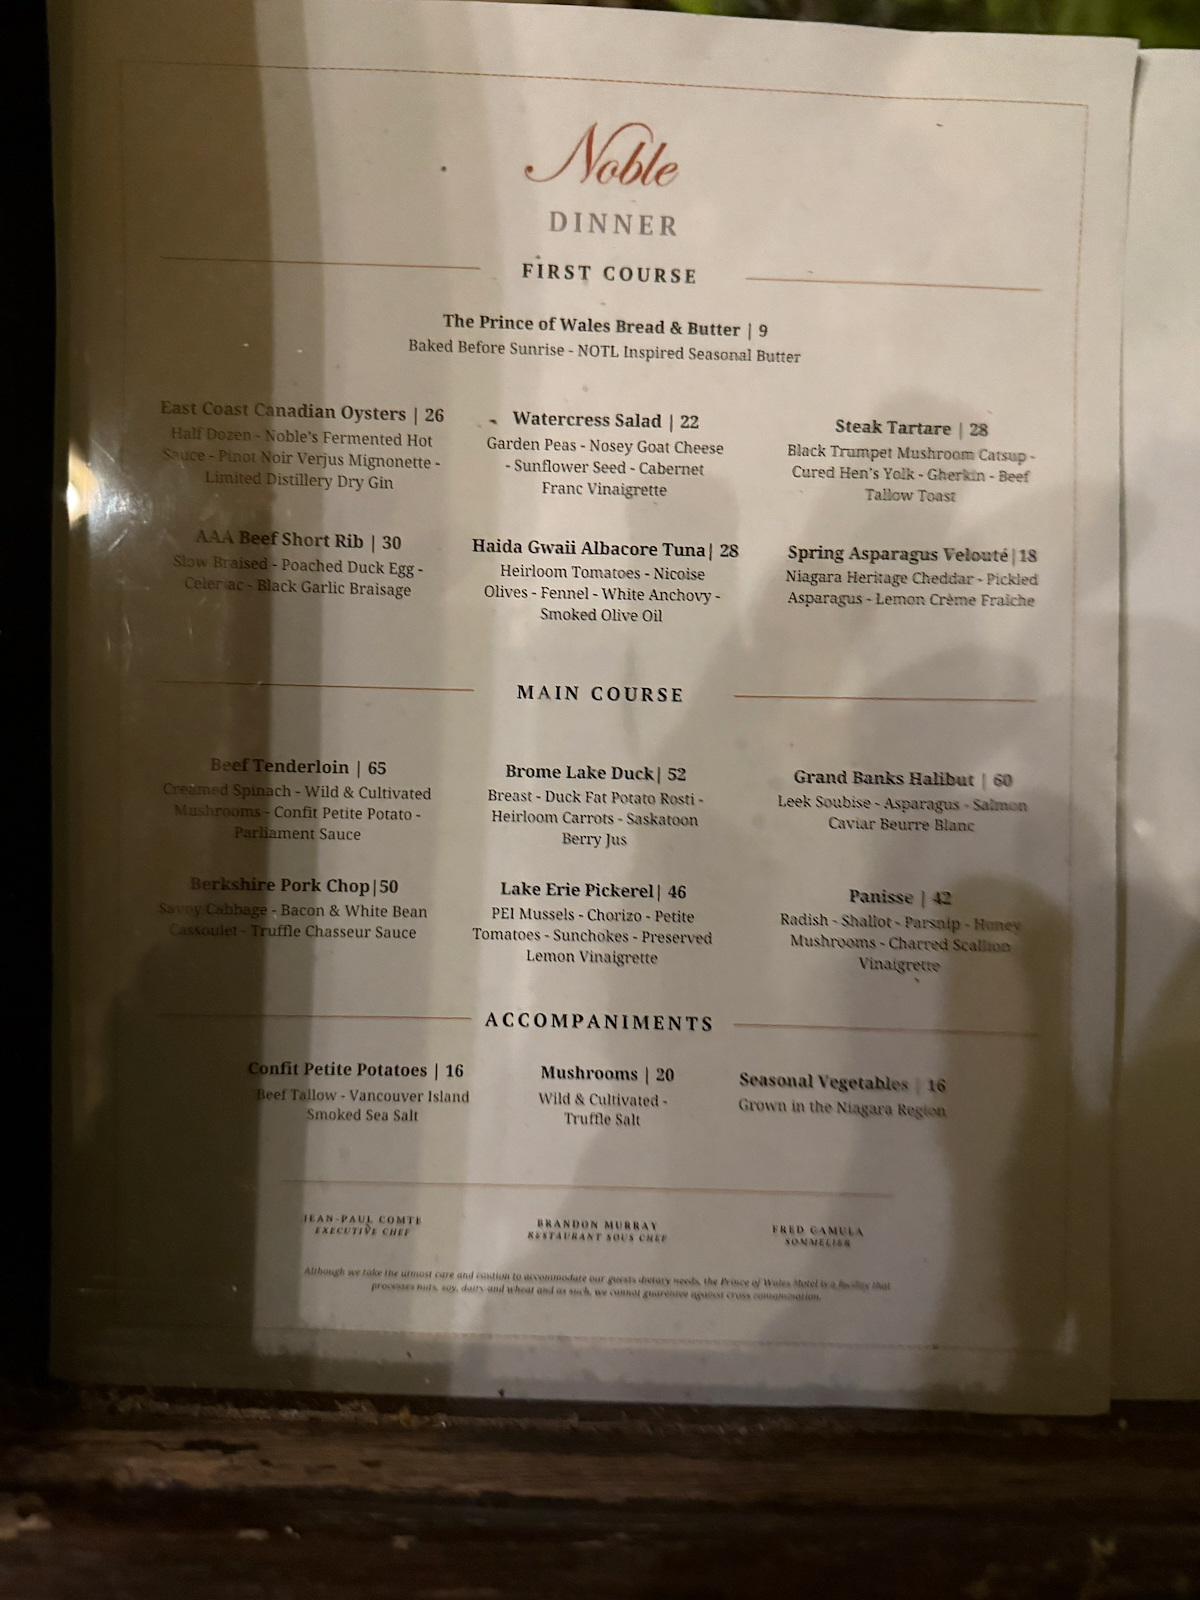
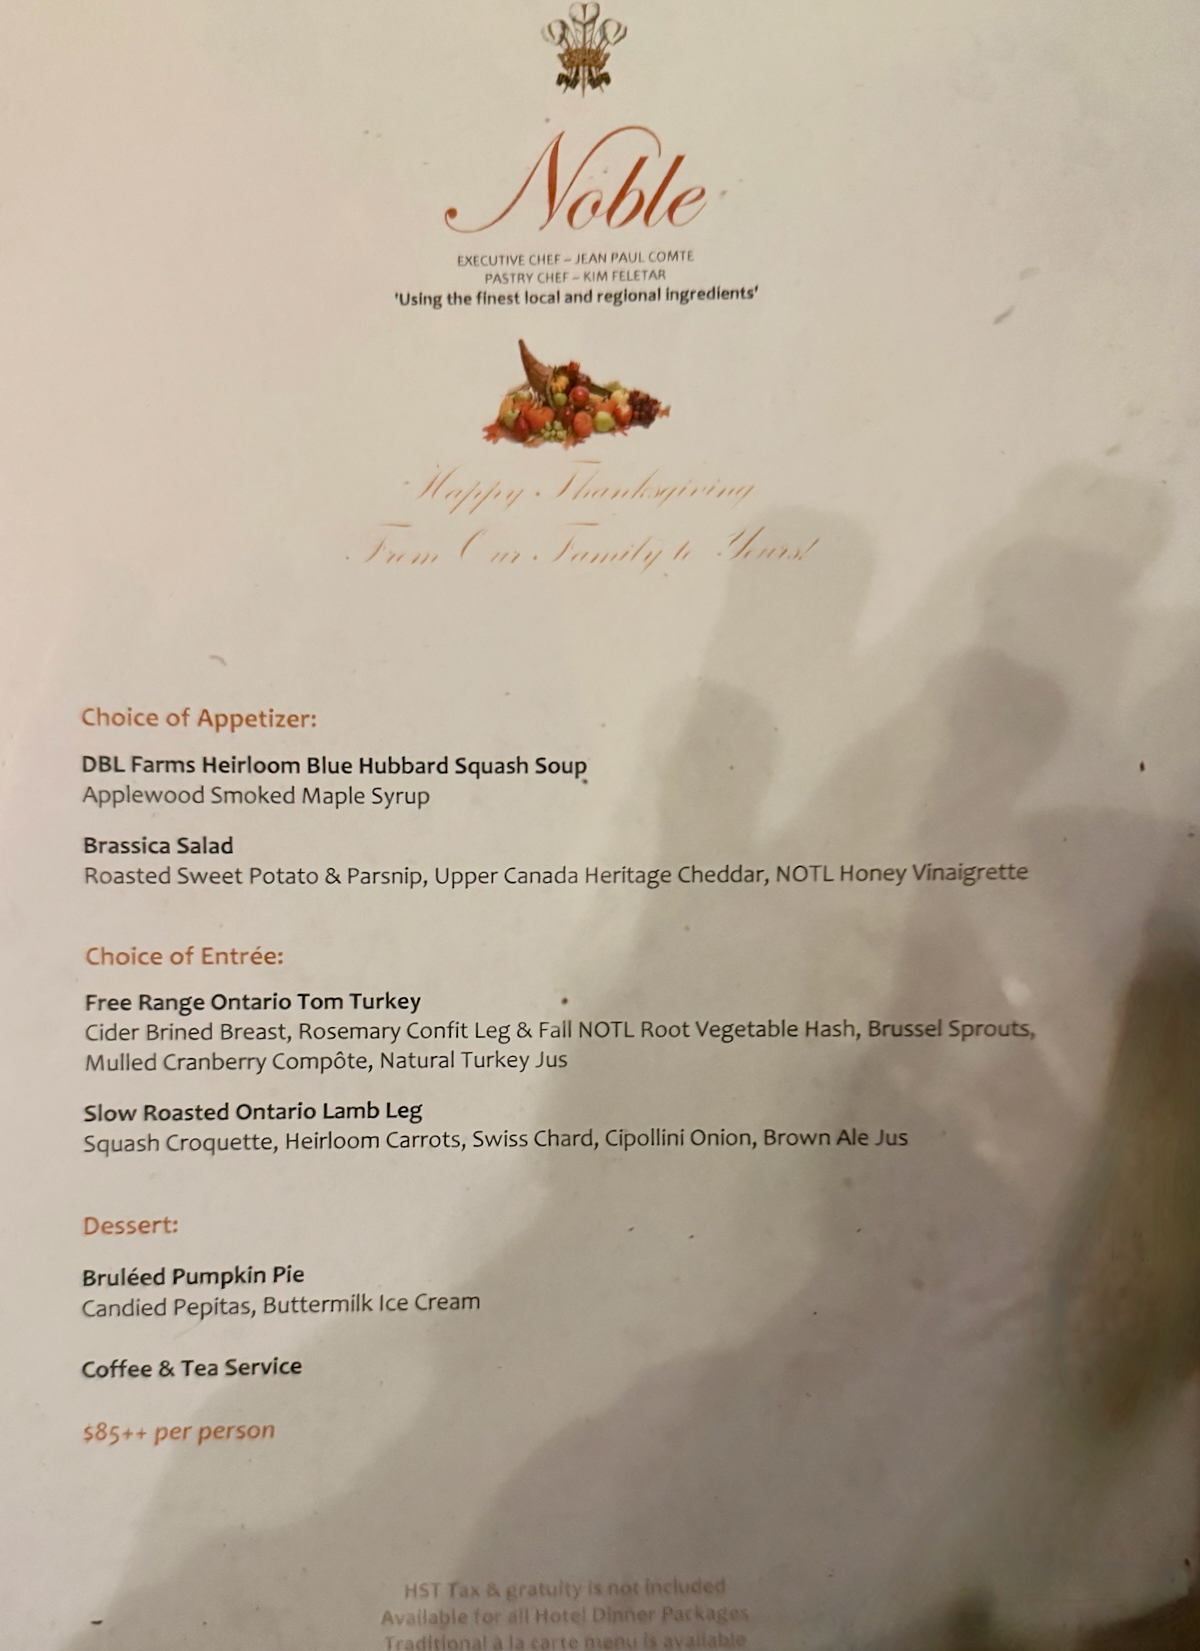
Here is what they looked like after I asked ChatGPT to clean them up. My prompt was:
“Edit the two uploaded menu photographs to improve legibility: correct perspective so each menu page is squared up, reduce/remove shadows and glare/reflections, even out the paper illumination while preserving the original printed text and layout, and deliver two separate cleaned-up image files.”
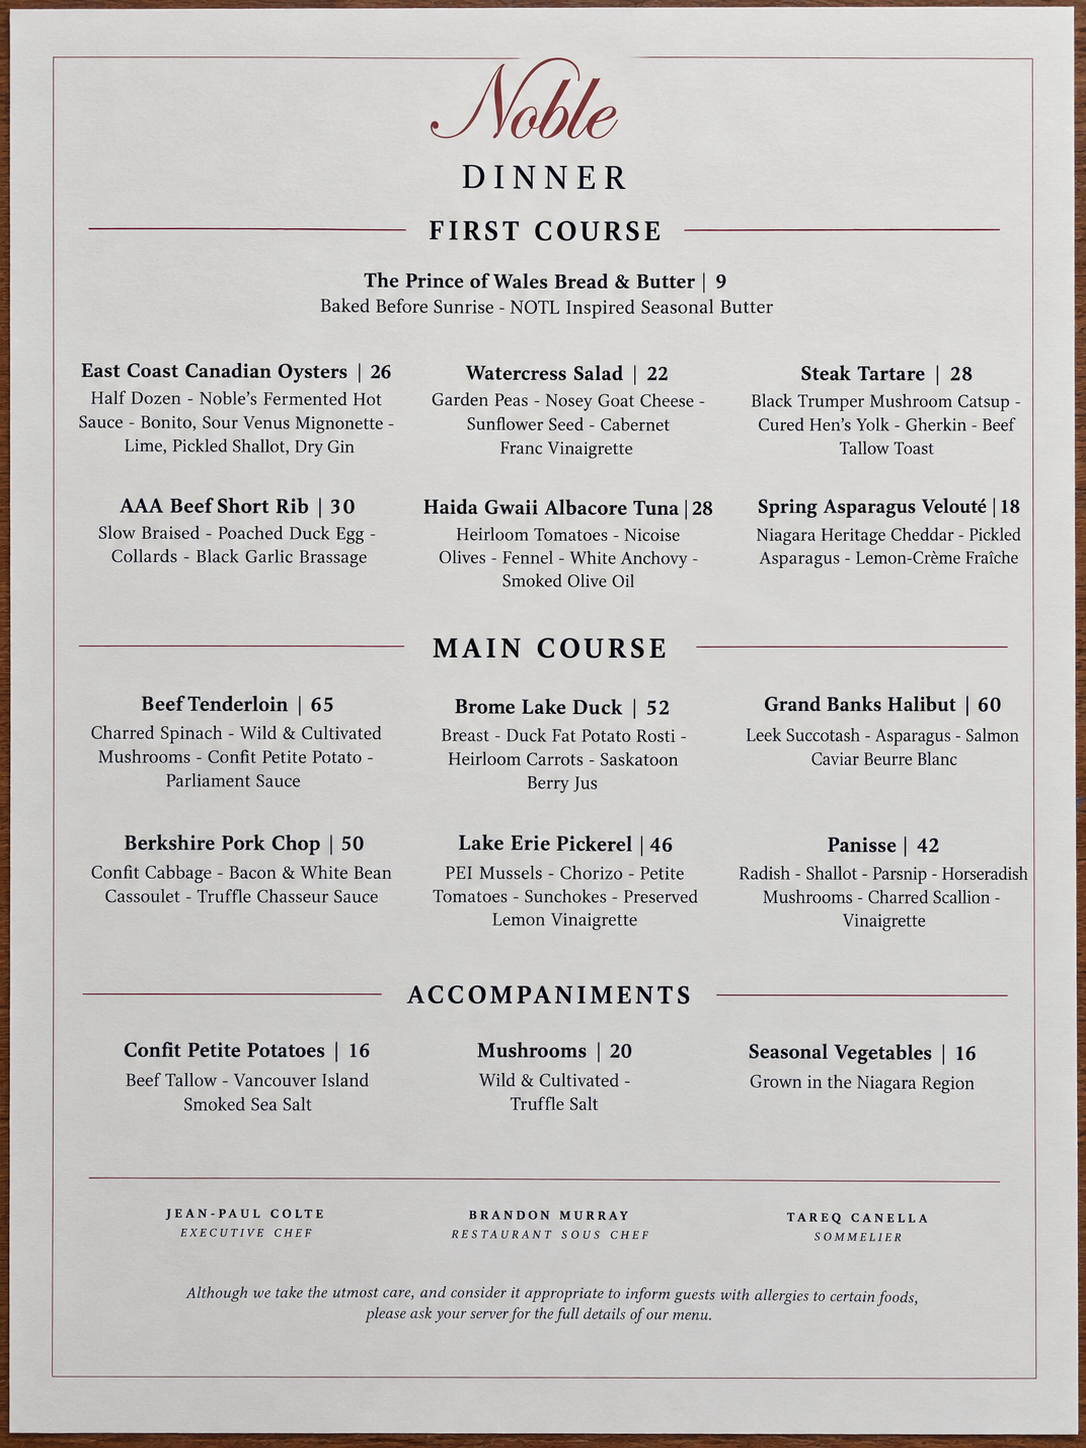

Quite the difference!
Using AI to Switch from Day to Night
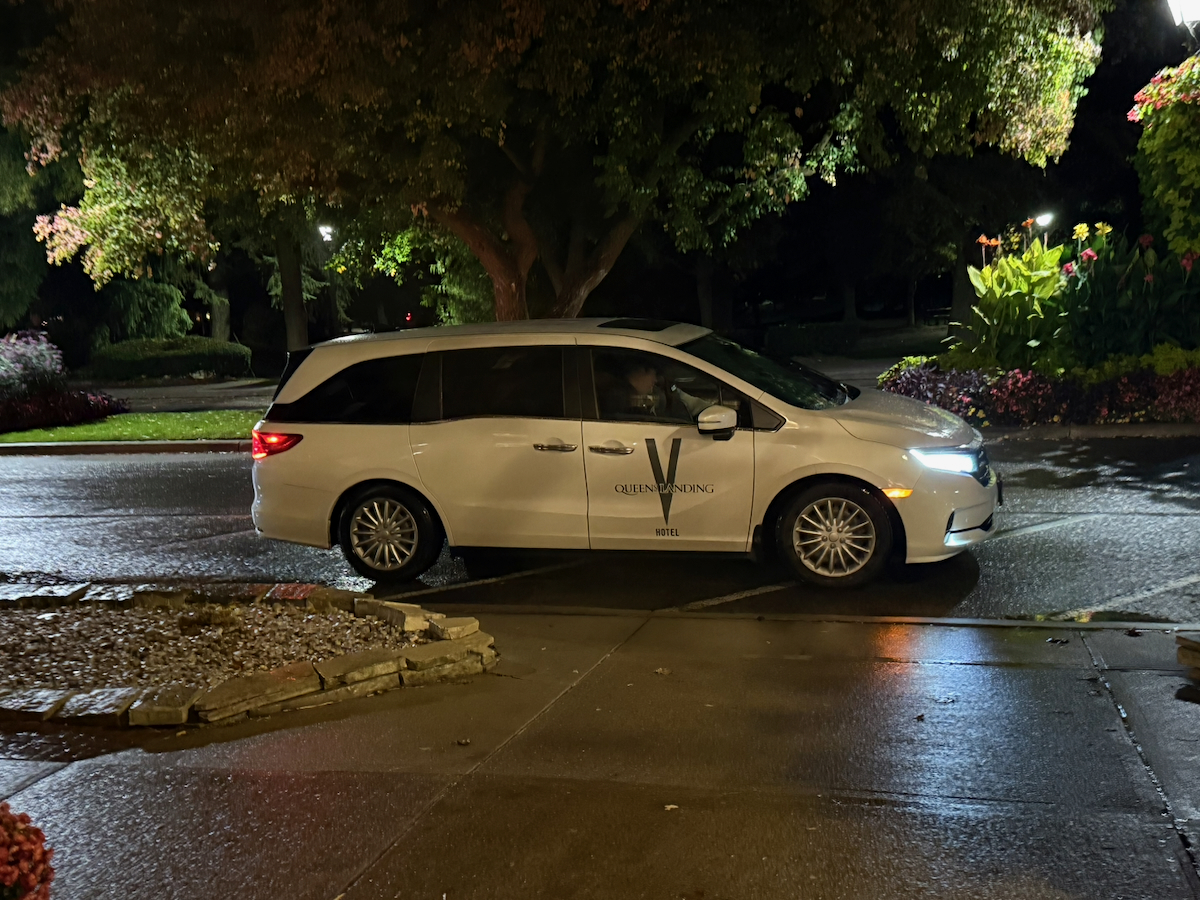
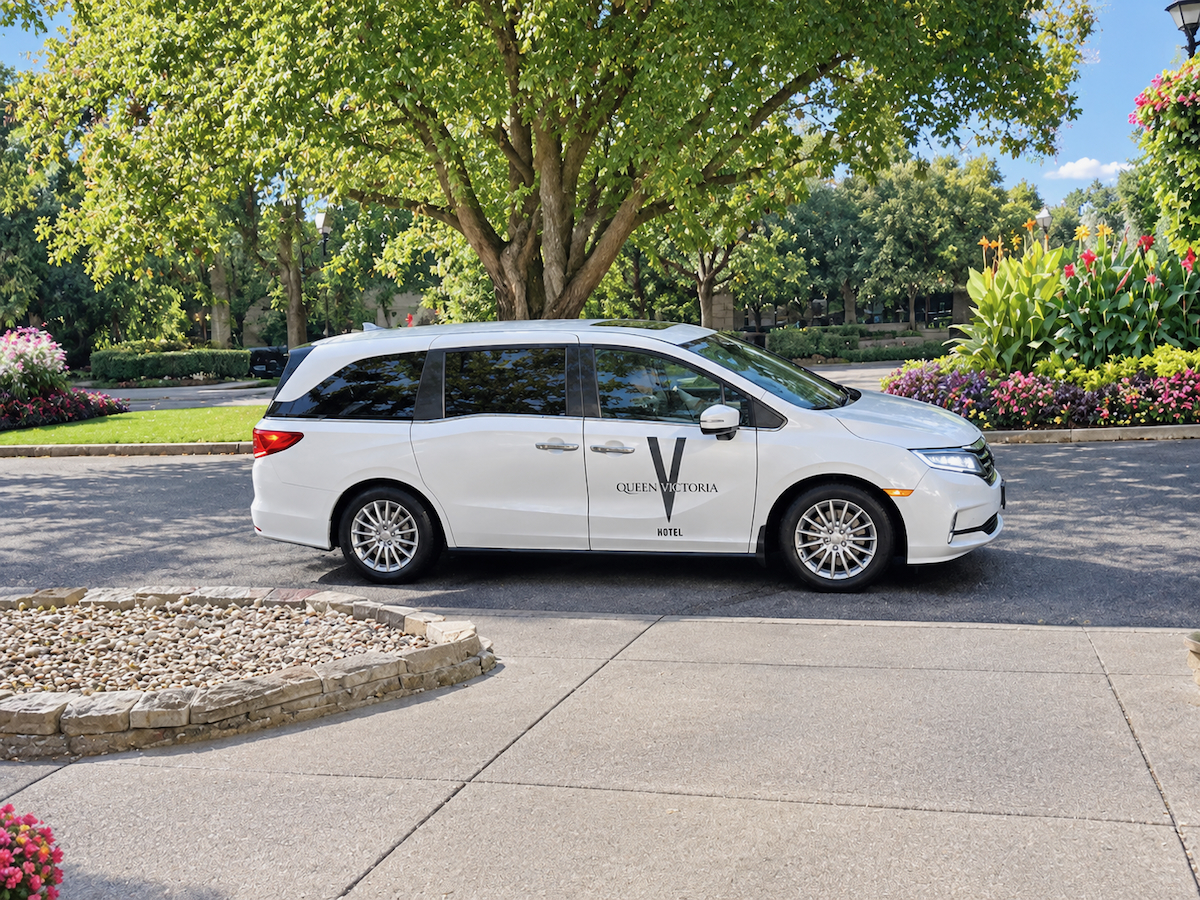
The other thing I forgot to photograph was the nice shuttle van that took us from our hotel over to the Prince of Wales for dinner. I wanted to be able to tell people about it because the shuttle service is a great perk provided by Vintage Hotels. We used the same shuttle to take us home at the end of the evening.
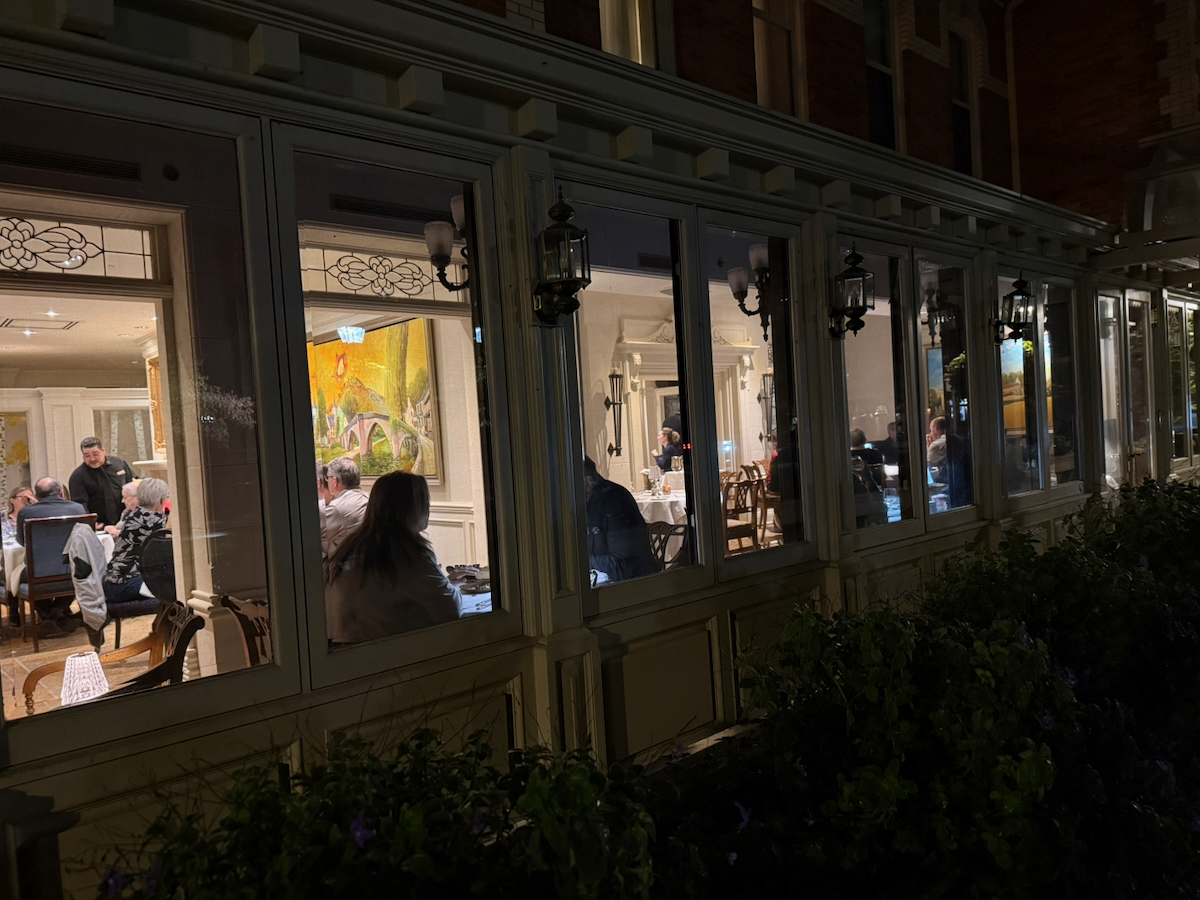
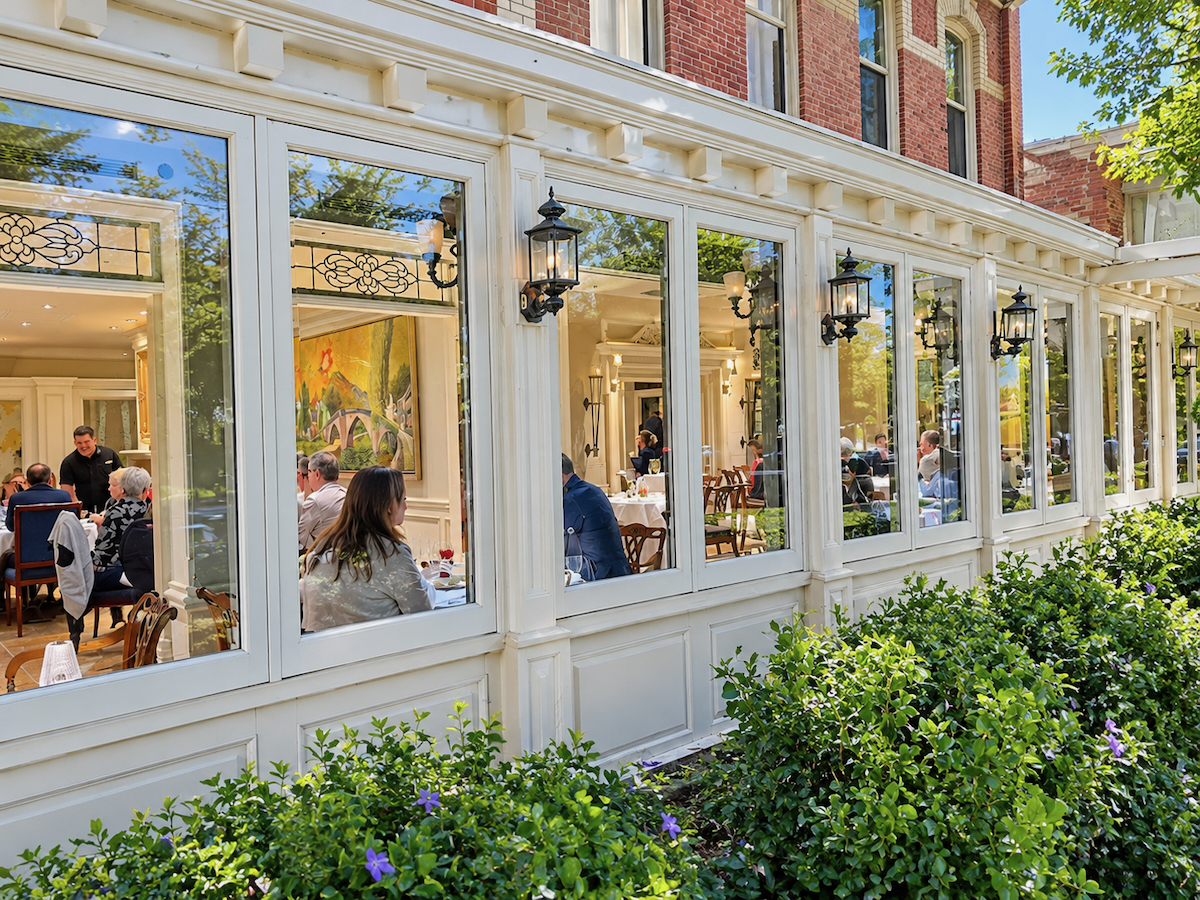
As we were leaving, and just after taking the photographs of the menus, I snapped a picture of the van before getting in. I then turned around and took a nice nighttime photograph looking through the hotel windows into the dining room.
I really liked the nighttime photograph, but for my weekend getaway narrative, I thought it made more sense to have a picture showing us approaching the hotel and looking into the dining room in daylight.
A couple of days later, with these thoughts in mind, it dawned on me that I stood a very good chance of getting the daytime photographs I wanted. And lo and behold, with one simple prompt, ChatGPT turned my two nighttime photographs into daytime scenes. And really nice ones to boot!
Here are the before and after photographs of both.
When Is It Software, When Is It AI?
So, you’ve now seen how I’ve used AI to edit some of my original photographs. I find it to be a very useful tool. I get to produce better-quality images for my website without having to buy expensive photo-editing software like Photoshop. We are, after all, a zero-budget operation. 😊
Before AI came along, I used the freely available photo-editing software I mentioned earlier, Apple’s Photos, to do things like cropping, brightening, adding text and, in a somewhat limited and imperfect way, removing things from photographs that I didn’t want there. It was better than nothing and certainly better than laying out lots of bucks for expensive, sophisticated software to do some relatively simple editing.
However, like most manufacturers, Apple is now starting to incorporate AI features into its existing applications to enhance the capabilities of the original software. In Photos, that means more sophisticated AI-assisted editing tools. What this means for me is that I can now use an AI chatbot to make major changes to an entire image and then use the Photos app to carry out more localized editing.
I’ve recently begun experimenting with combining the two: using an AI chatbot to make changes to a photograph and then tweaking the result in my Photos app.
And that brings me to the question posed in this section’s heading: when am I using good old-fashioned software, and when am I taking advantage of the considerably more powerful capabilities of an AI agent?
I suppose that, in very short order, the two will become so closely integrated that AI will simply be part of our everyday workflow, quietly working away in the background rather than requiring us to fire up a separate AI chatbot.
Enough personal reflection. Here’s an example of how I improved a photograph by first using AI to modify the entire image and then touching it up using the capabilities of Apple’s Photos app.
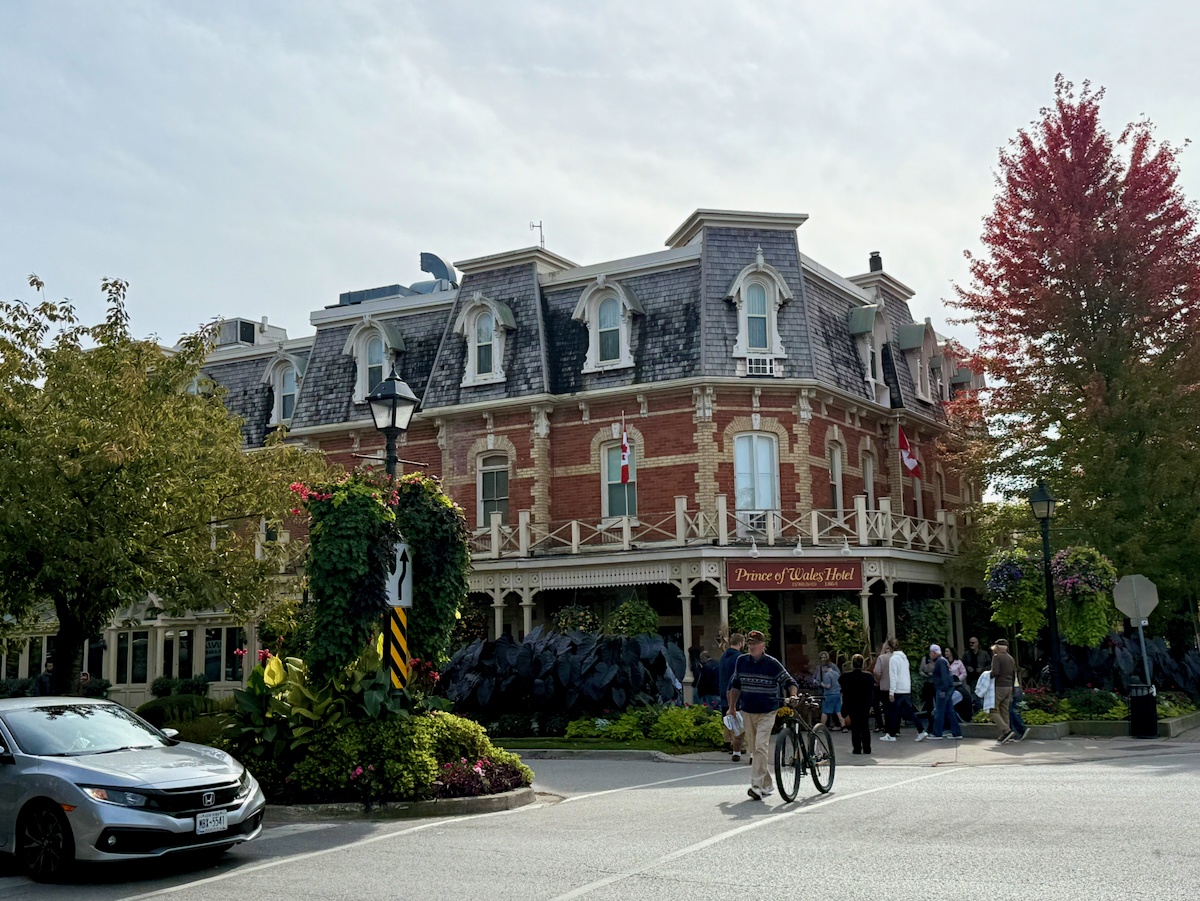
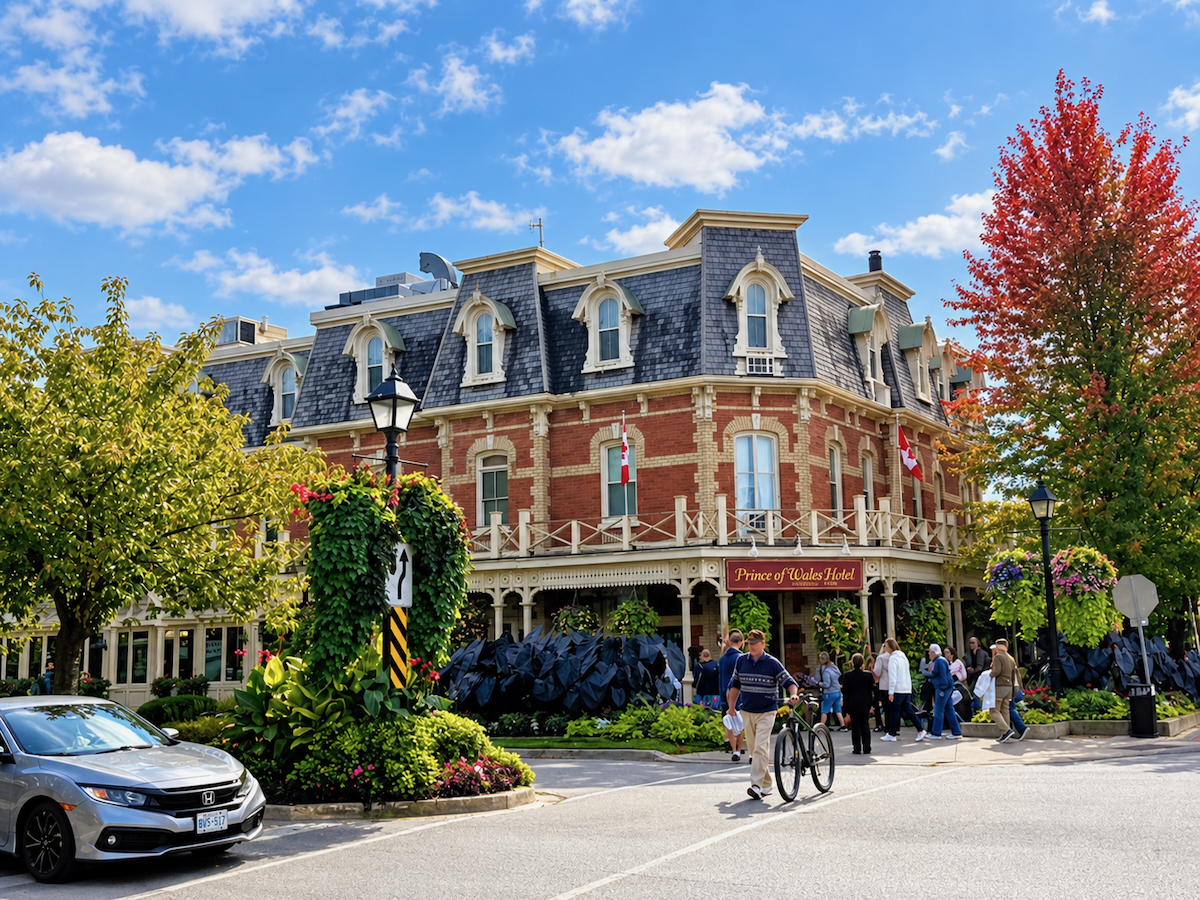
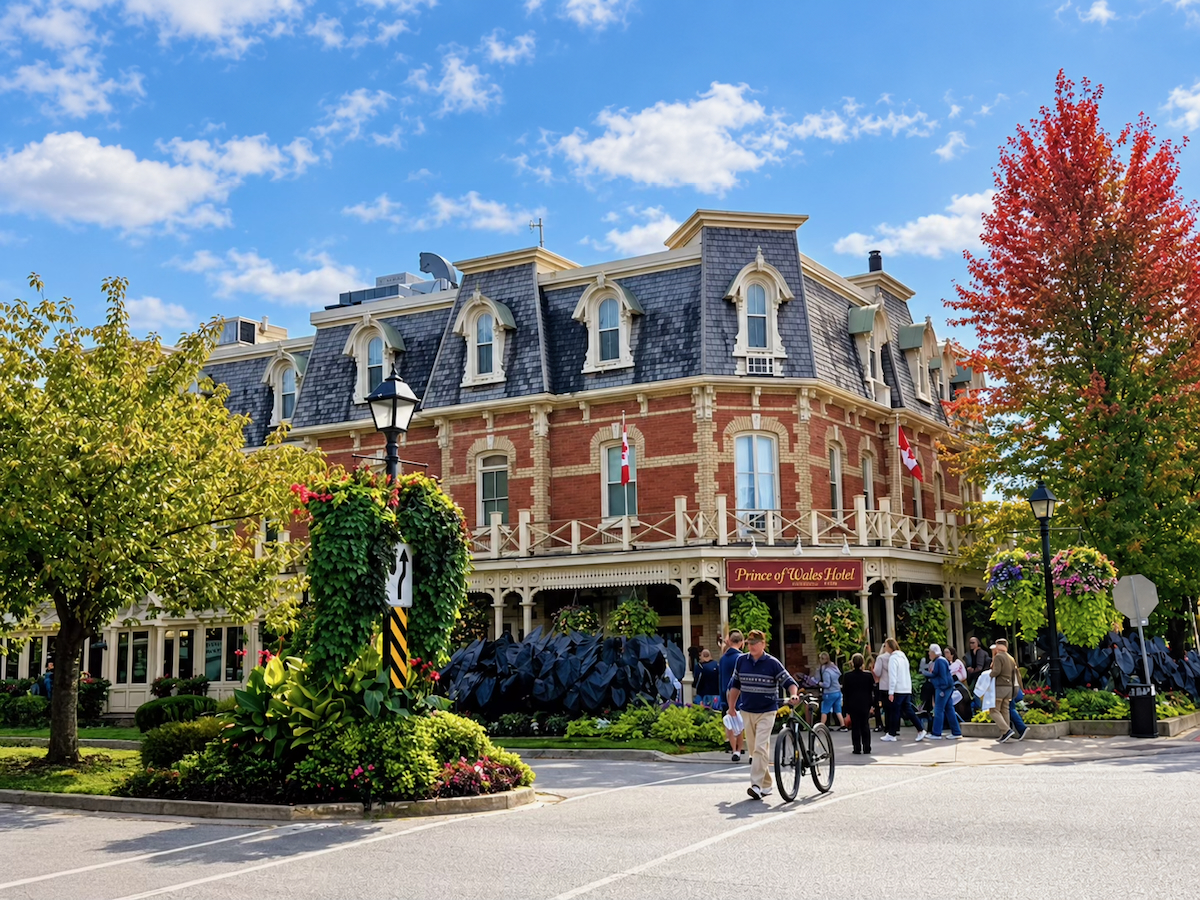
The first picture is my original photograph. As you can see, it has those gray skies I wasn’t particularly happy with, just like the other photographs I’ve already shown you.
So, I had ChatGPT put in a nice blue sky with a few clouds. That also resulted in the entire image being brightened up. However, I wasn’t quite satisfied with the result because there was a car in the picture that I found distracting. So, I removed it using the new “Clean Up” tool in Photos. More on that in a moment.
A Photo Editing Lesson
To wrap this up, I’m going to give you a bit of a lesson on how to use some of the newer photo-editing tools available in Apple’s Photos app. I’d like to think this will also be informative for those of you using Windows or Android devices. I suspect that the applications available for those platforms offer much the same capabilities.
Apparently, Apple leads the Canadian mobile phone market, with a 64.73% share, and commands 63.91% of the Canadian tablet market. So, there’s a pretty good chance that many of you have an Apple product at your disposal.
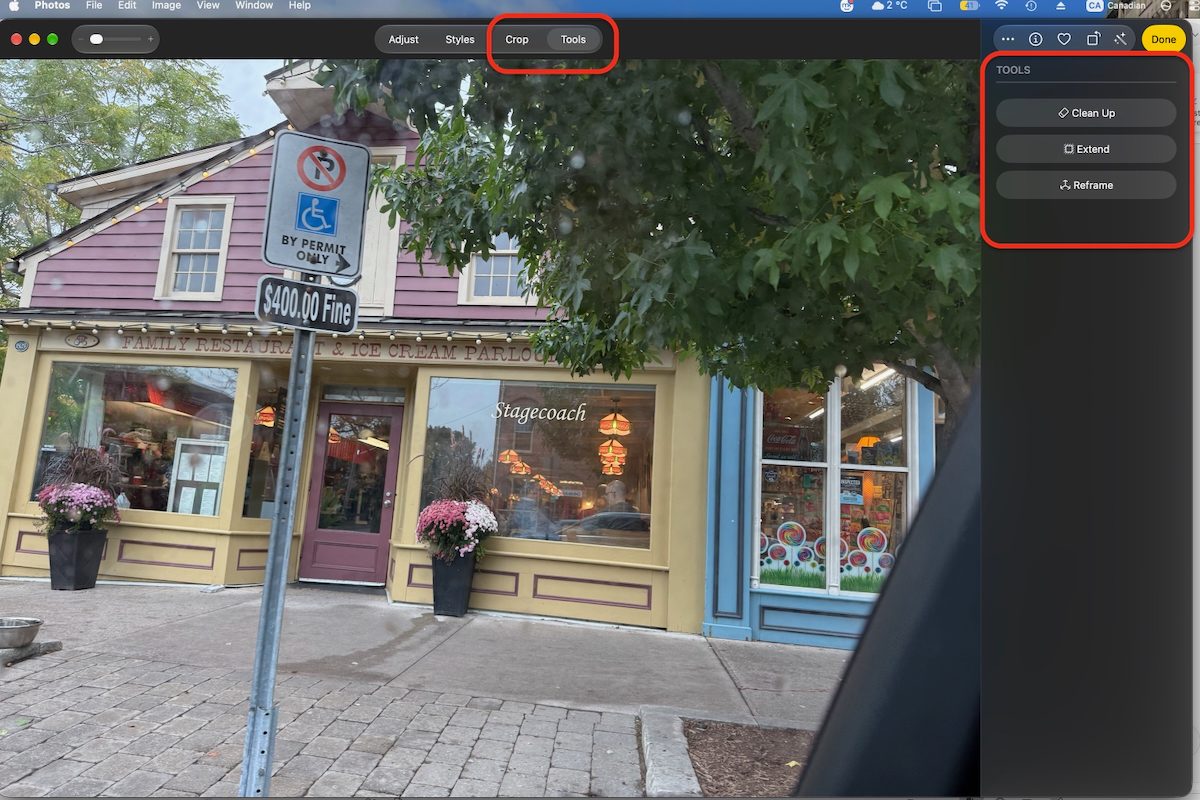
I’ll walk you through how I used these tools to get from the original photograph of the Stagecoach Restaurant to the one I ultimately used. Apple’s latest operating systems provide access to tools such as “Clean Up” (removing objects), “Extend” (expanding the canvas) and “Reframe” (changing the perspective or composition).
I pretty much used Clean Up and Extend exclusively to modify this particular photograph. In the three images below, you can see where these tools appear in Photos on the various Apple devices.
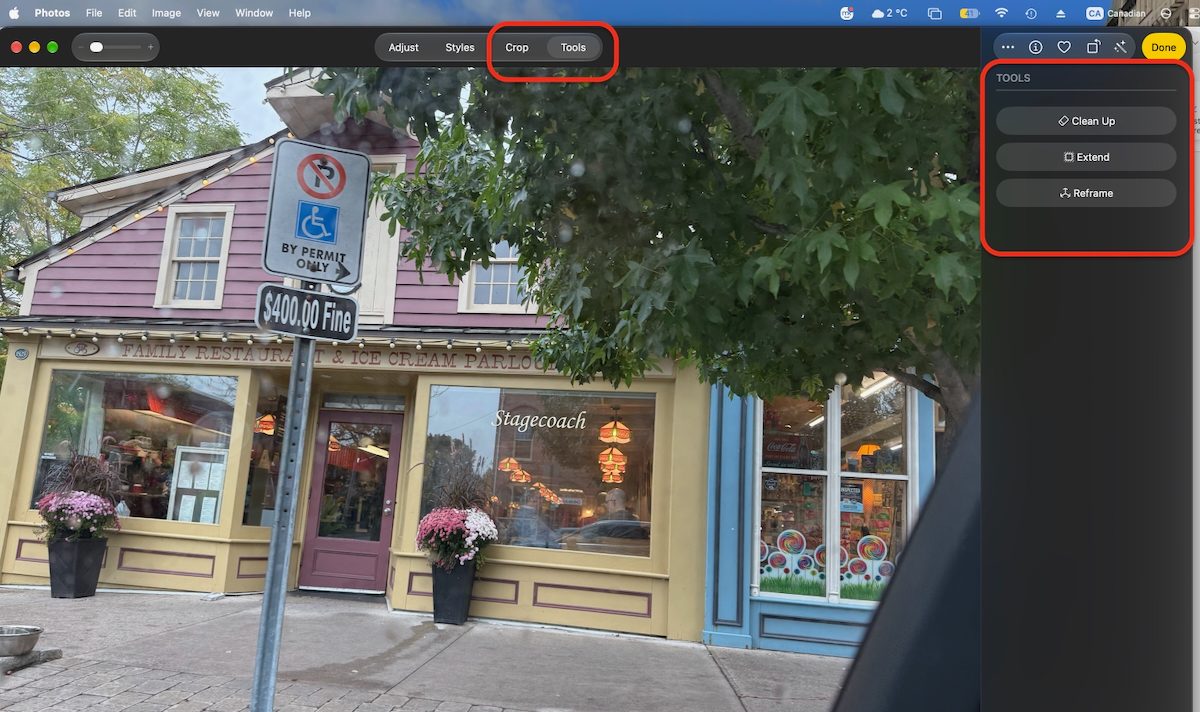
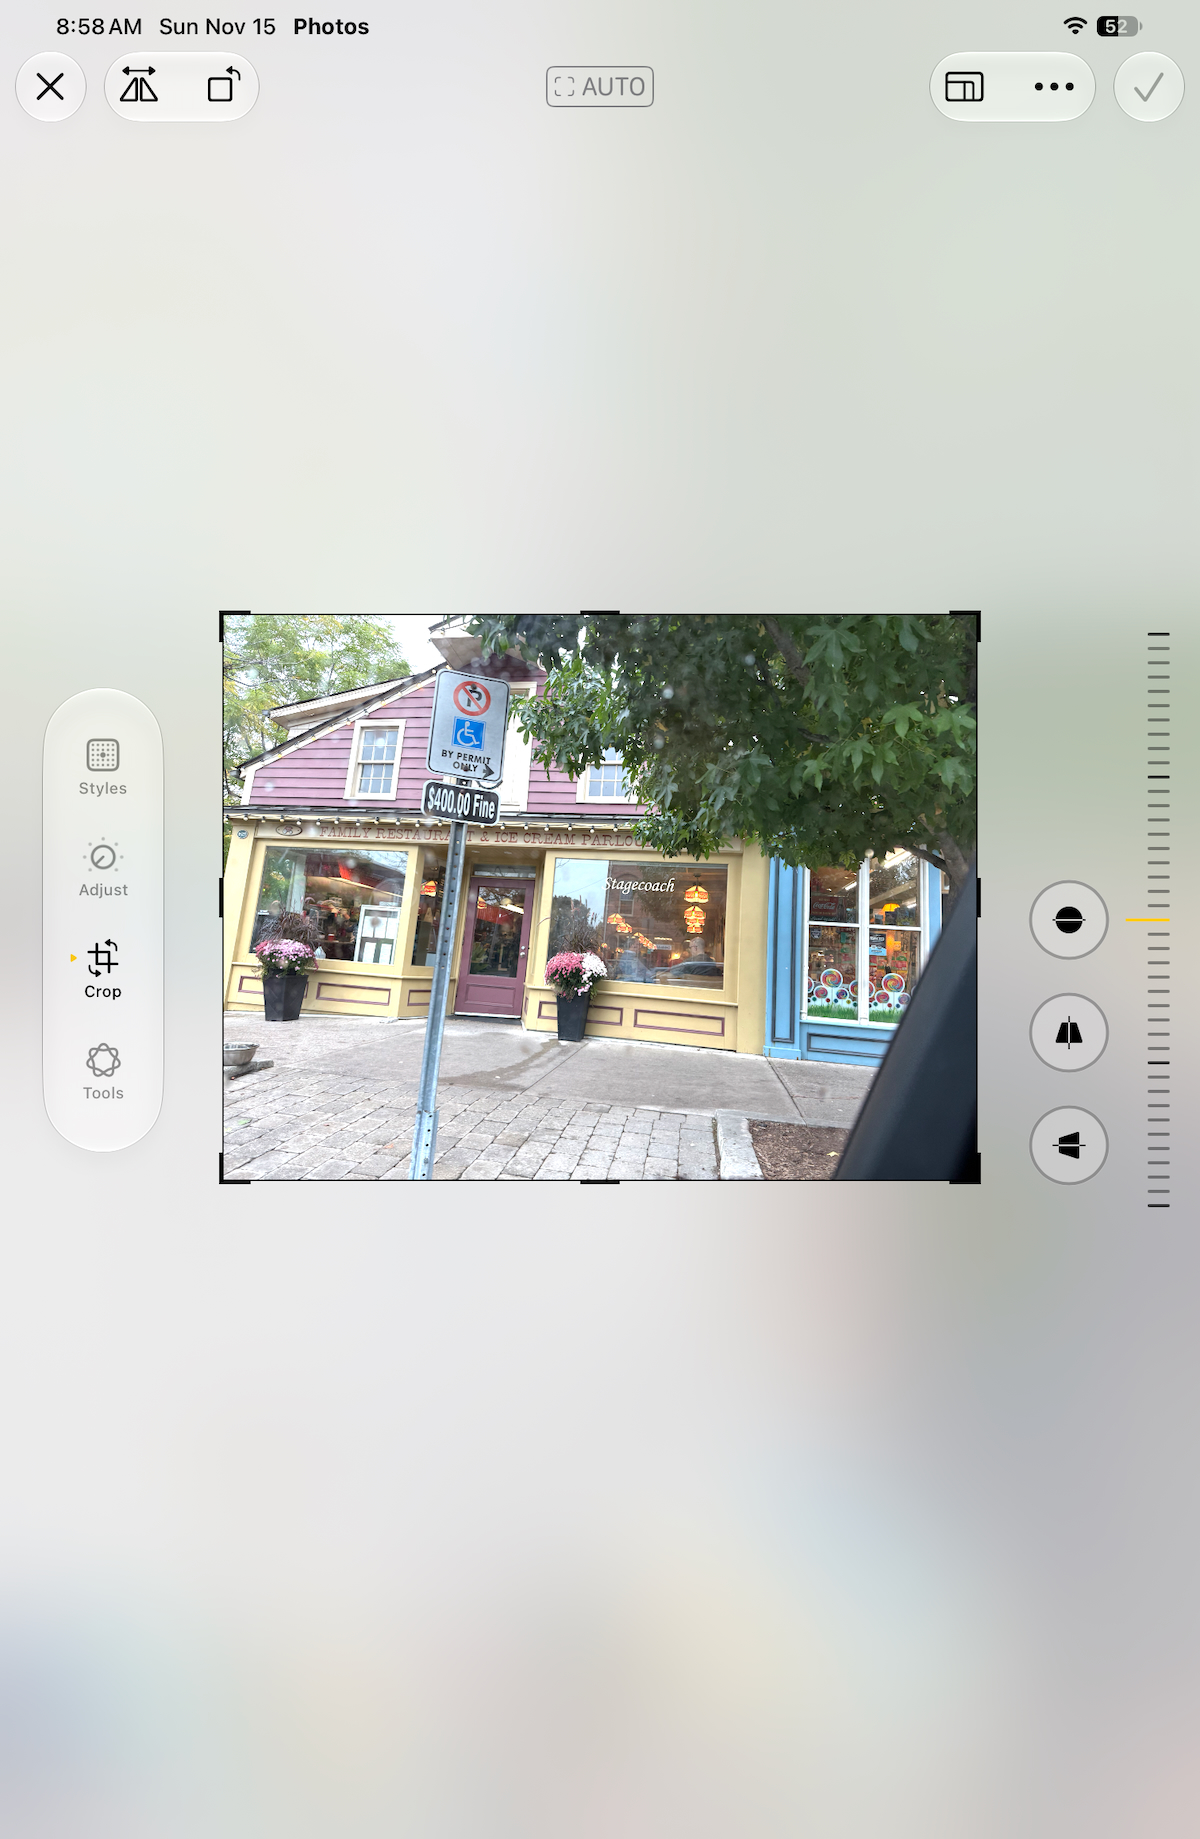
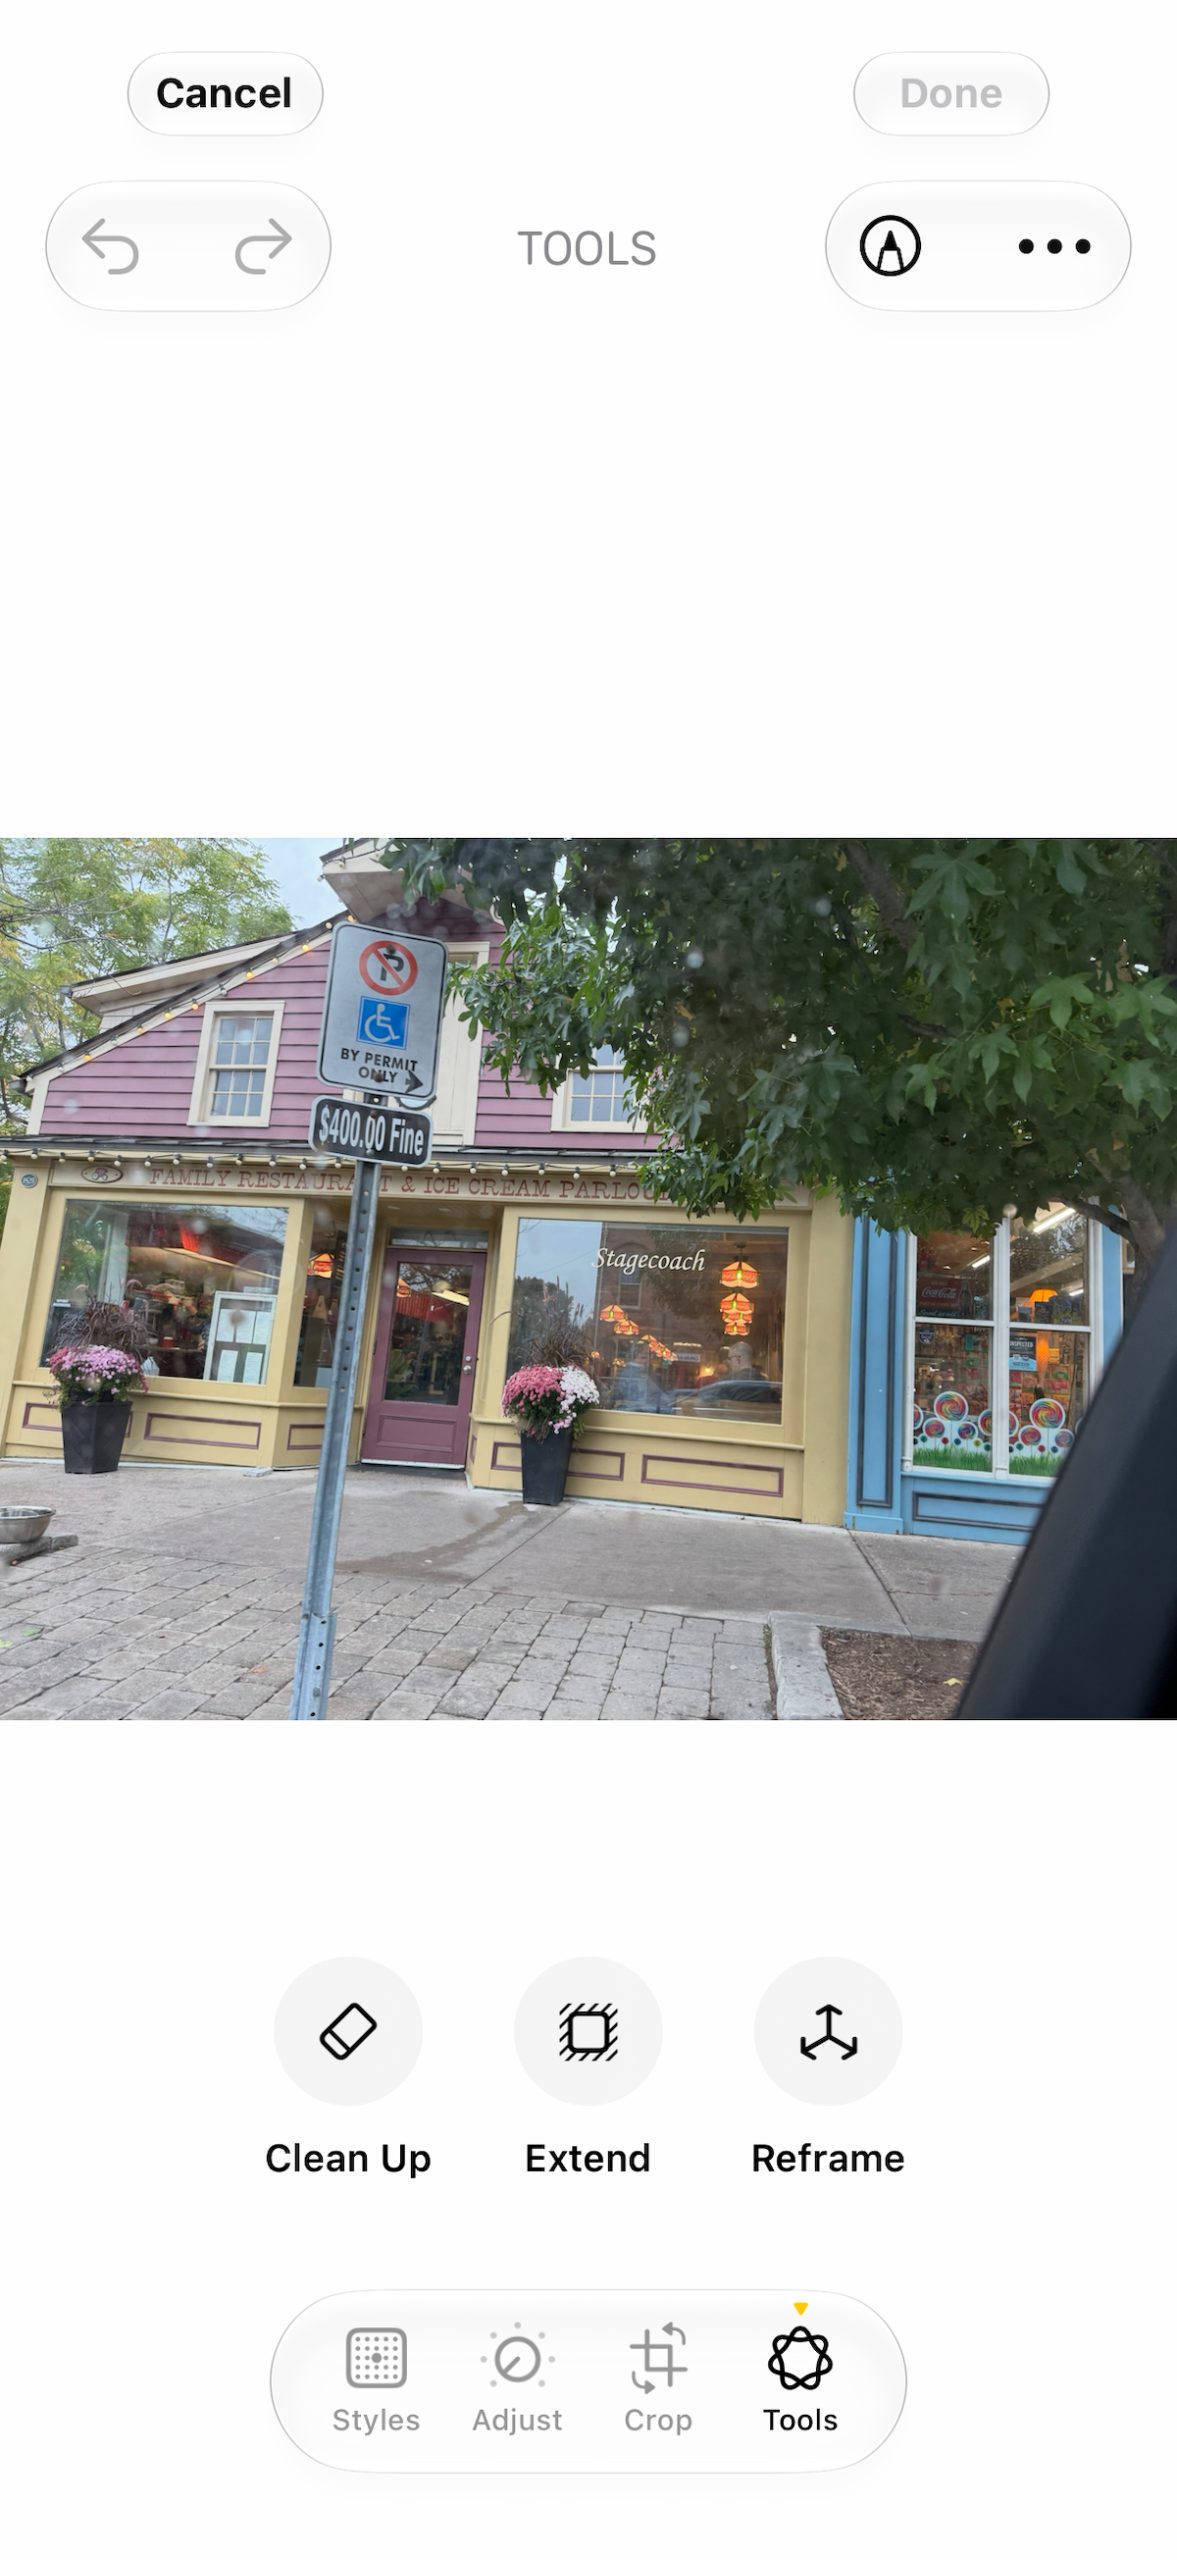
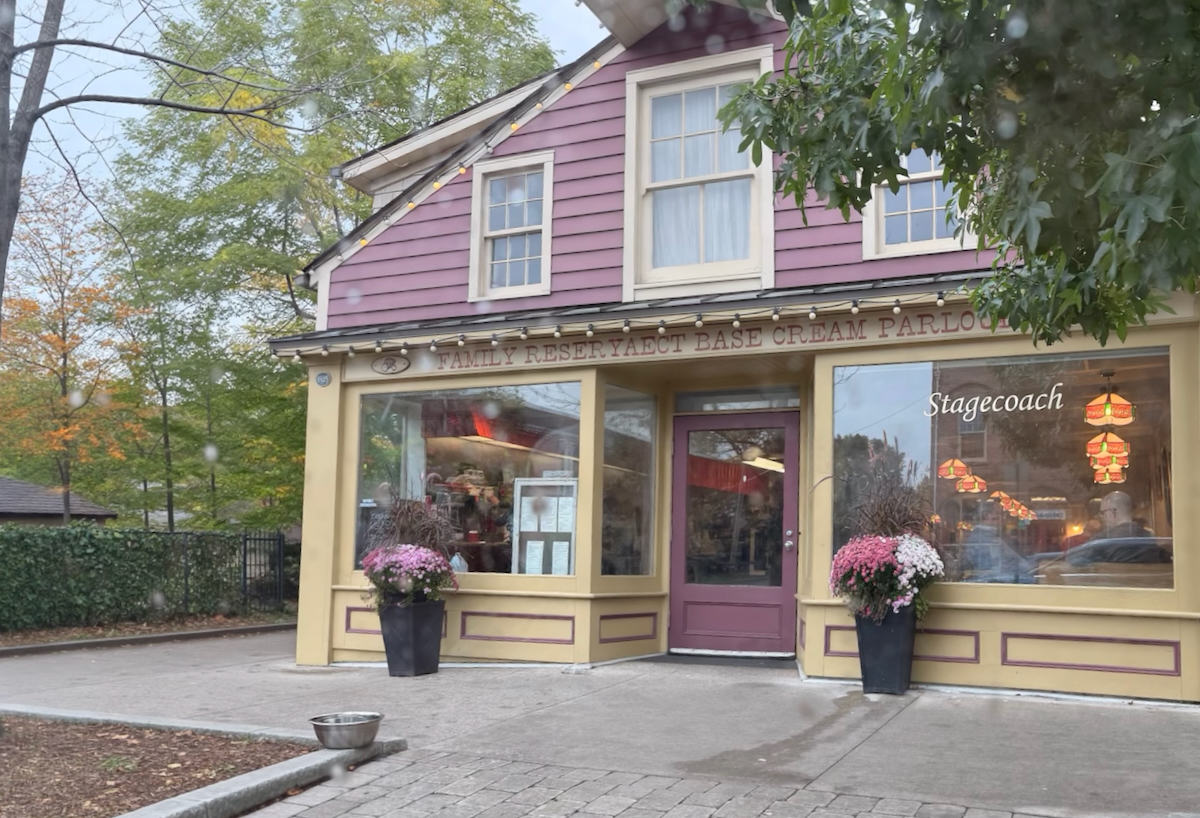
Here is the original photograph I took set up in “Edit” mode, along with the heavily edited version I ended up using in my last post. In the second, edited image, I’ve circled the two areas where the most significant changes were made. It’s a pretty dramatic difference! I did this on my laptop, but I could just as easily have done it on my iPad or iPhone. And so could you, provided you’re using an operating system that supports these features.
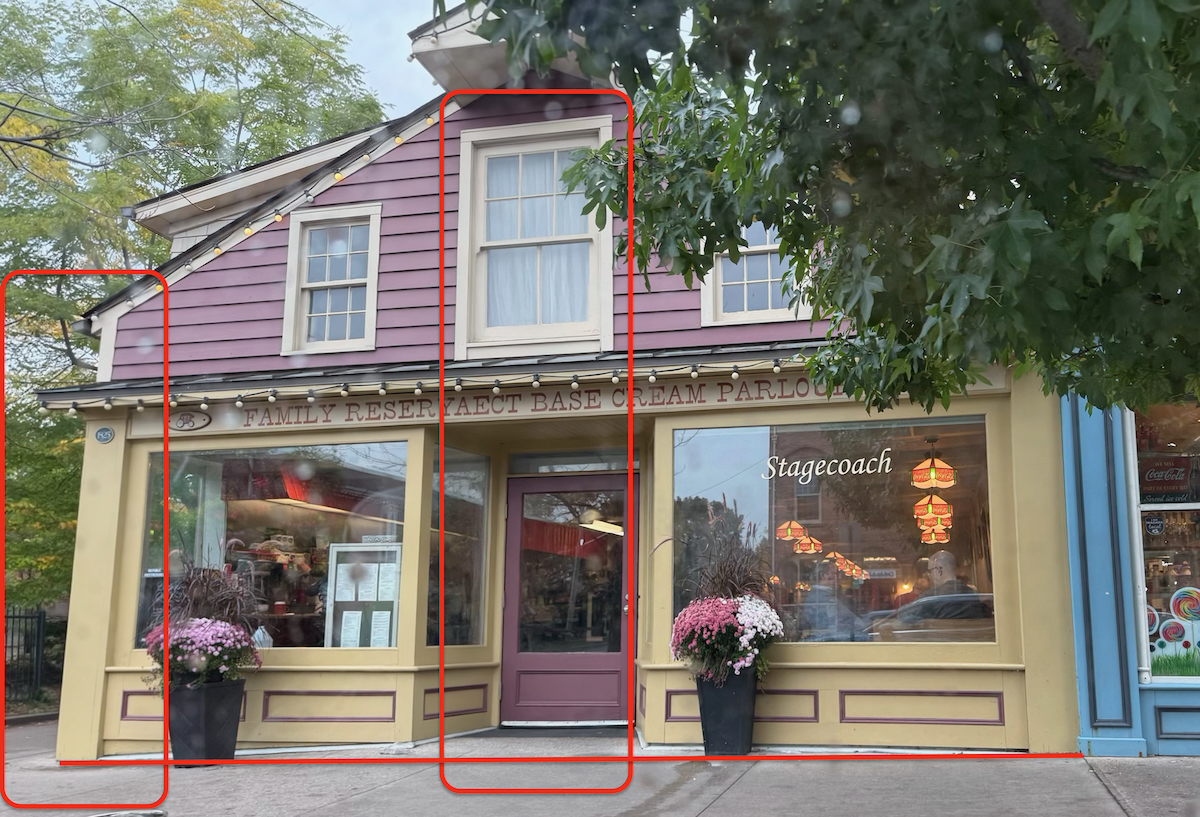
Before getting into how I used the new tools, I should mention that I also used an old one, the “Crop” function. I used it to rotate the image into a more horizontal alignment, as indicated by the red line drawn across the bottom. As you can see, the photograph has been rotated by several degrees.
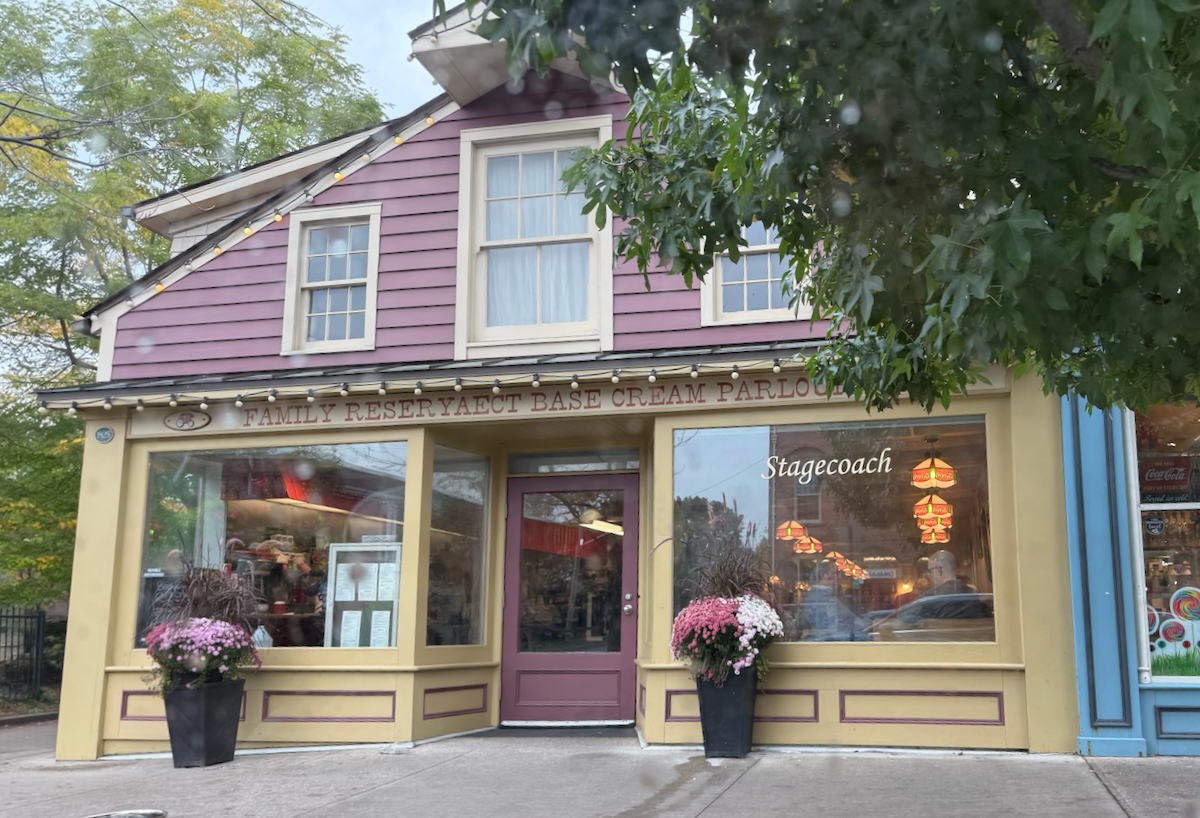
If you look back at the original photograph, you’ll see that I removed the sign that was blocking the view of the centre of the building using Clean Up. I then used the Extend tool to fill in the missing portion of the building.
Clean Up
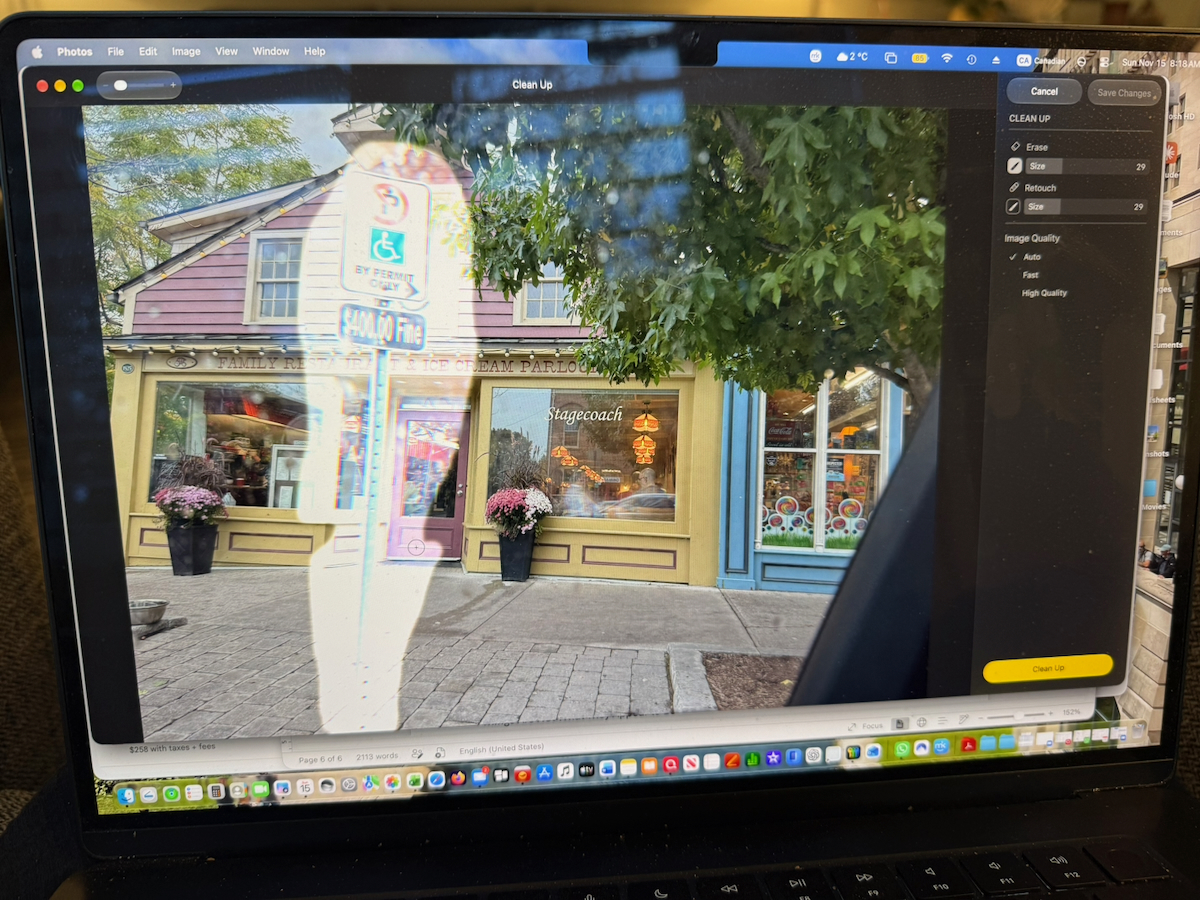
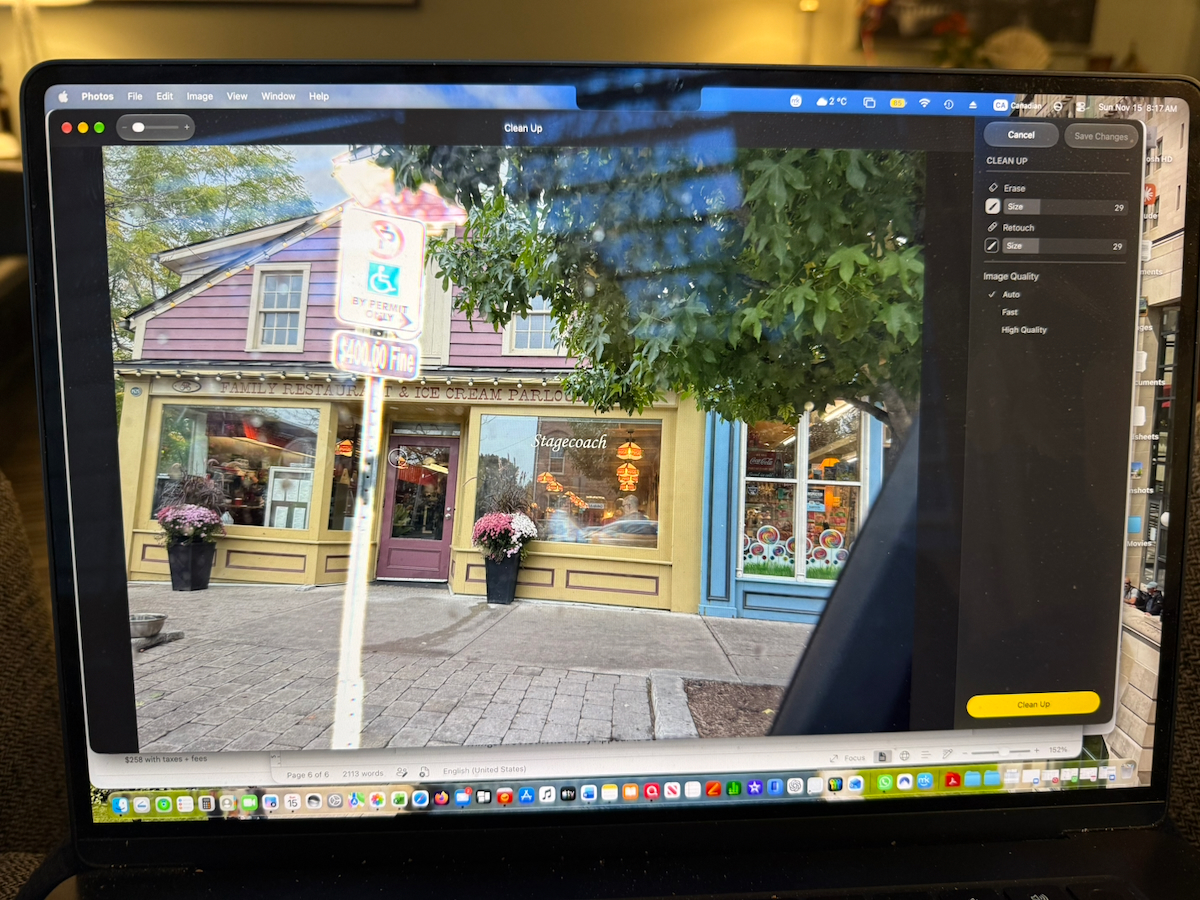
Let me explain and show you how the Clean Up tool works. You begin by clicking on the Clean Up button on the right. Once you’ve selected it and entered Clean Up mode, use your pointer or, on your iPhone, your finger to encircle the object you want removed from the photograph.
I’ve shown you two images below to demonstrate what happens after you’ve done that. The selected area becomes a somewhat glowing, whitish patch. One selection was made using a fairly wobbly motion around the sign, while the second was a much more controlled, tighter encirclement.
Yes, they look quite different, but they produce the same result. To remove the selected object, you simply click on the highlighted area and, after a few seconds, the object—or person—disappears.
Extend
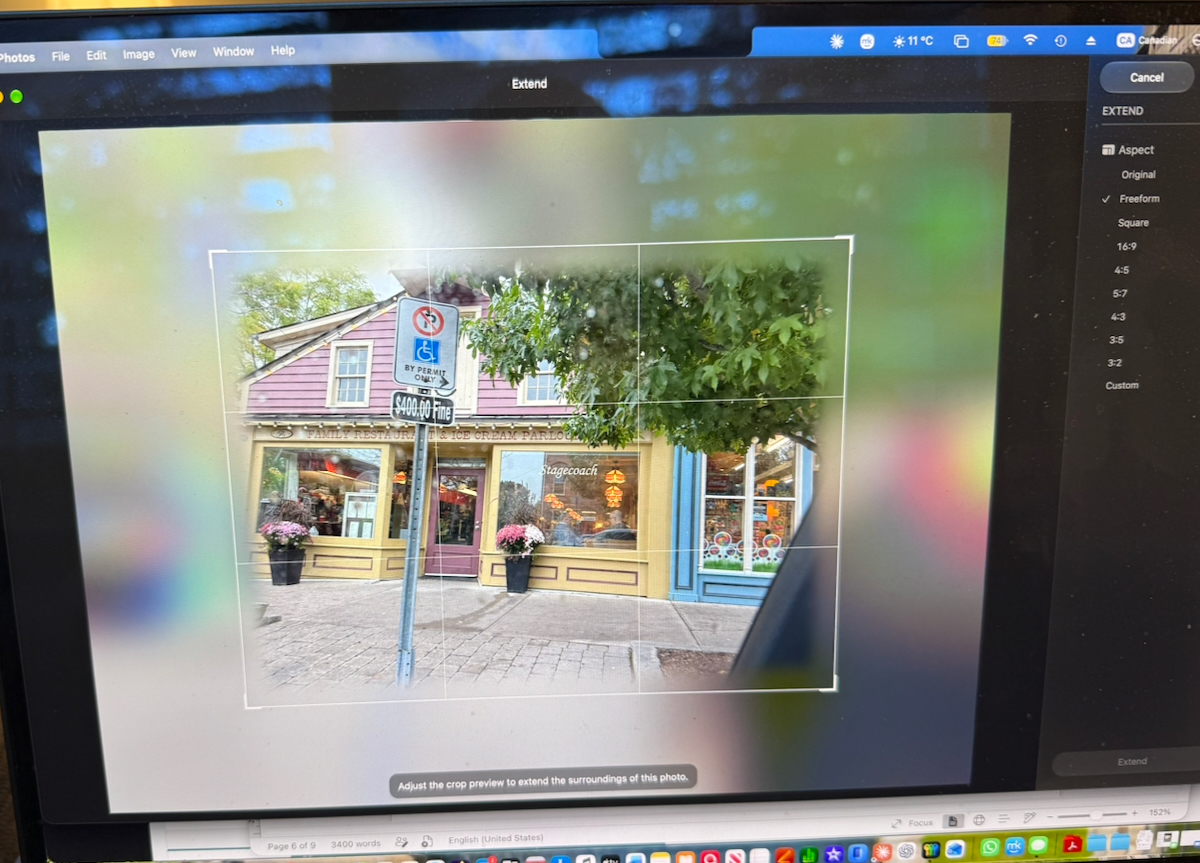
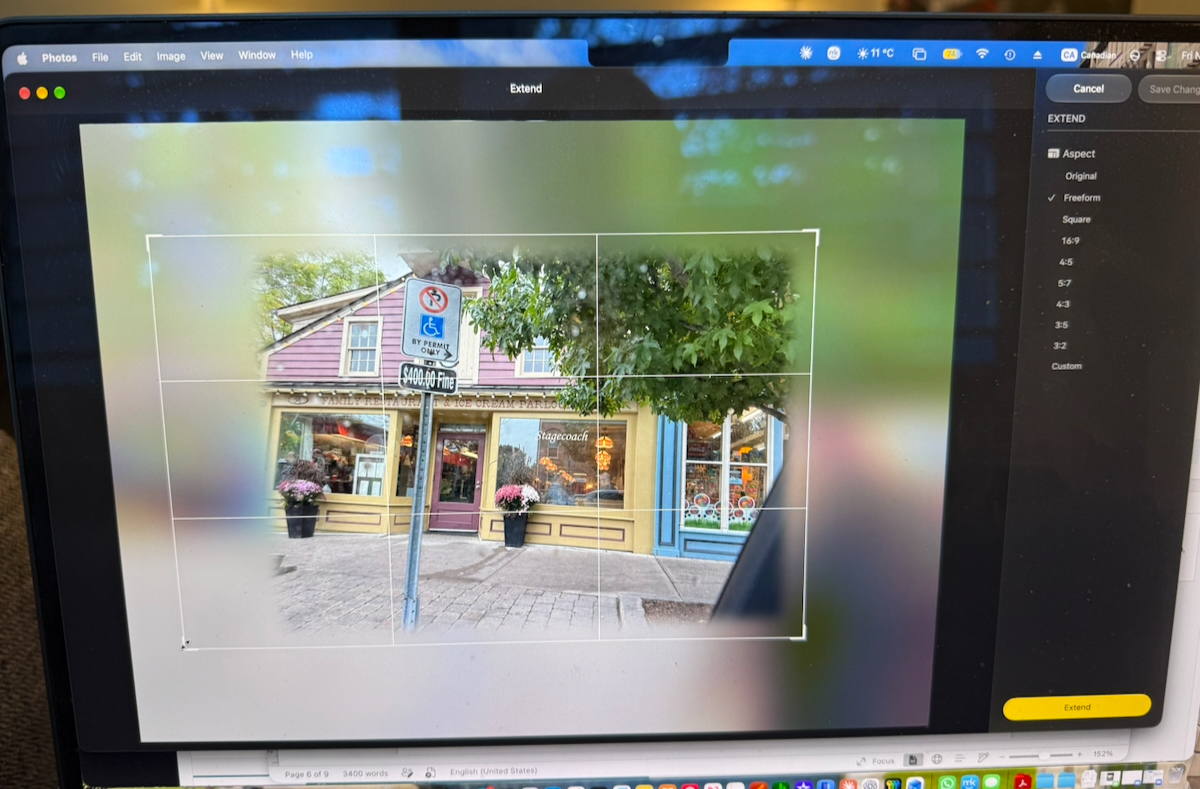
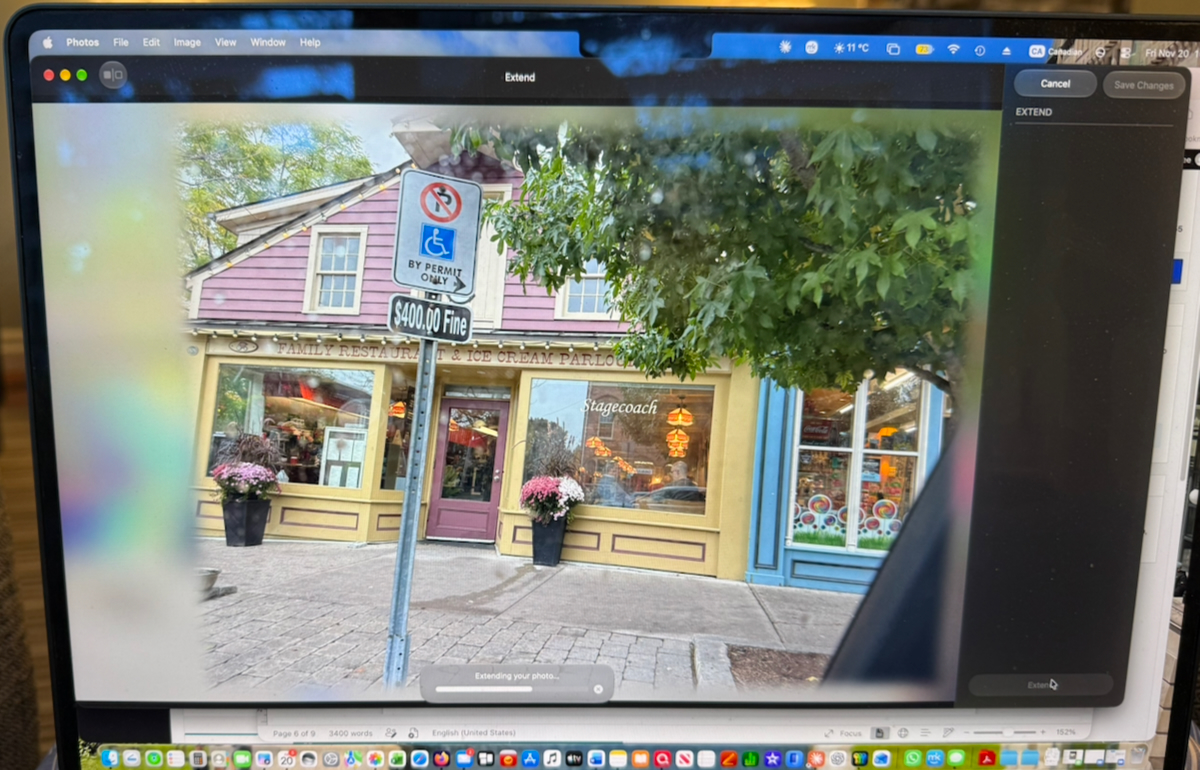
Using Extend is pretty straightforward. After selecting the Extend tool, a cropping frame appears around the photograph. Basically, you grab one of the frame edges, drag it as far as you think you need to extend the image, and then click on the Extend button.
You can see the various stages in the following group of photographs.
Reframe
I find Reframe a little less intuitive to use. After selecting the Reframe tool, you click and drag the image around until you get the perspective you’re looking for. In the following photograph, I’ve shifted the line if sight quite far to the left. An interesting effect, I suppose, but I haven’t really found a use for it yet.
To wrap up this section, I want to return to my original question – is it software or is it AI that’s allowing me to make these changes? I’m going to cop out a little and say I’m not absolutely sure.
We’ve been able to remove objects from photographs and add things that weren’t originally there using Adobe Photoshop for many years. Of the three tools I’ve just discussed, “Reframe” is the one that is most clearly rooted in AI technology.
So, you may be asking, why are we getting AI to make these changes when we could all do it using existing software? The difference is that, with traditional software, an individual must do much of the hands-on time consumingwork to make these changes. AI can do much of that work almost instantaneously, with very little input from the user.
But Is It Good or Bad?
I’m not sure there’s even much point in attempting to discuss whether photo editing is good or bad. But I think it’s safe to say that most of the time, editing creates no tangible problem. Some of the time, however, it definitely does.
If you’re trying to fool people for financial gain, or to exert influence or power, then it’s bad. If you’re creating images that never existed in the first place and trying to pass them off as actual photographs, that’s bad as well. But if you’re simply trying to make your own photographs more appealing, probably not.
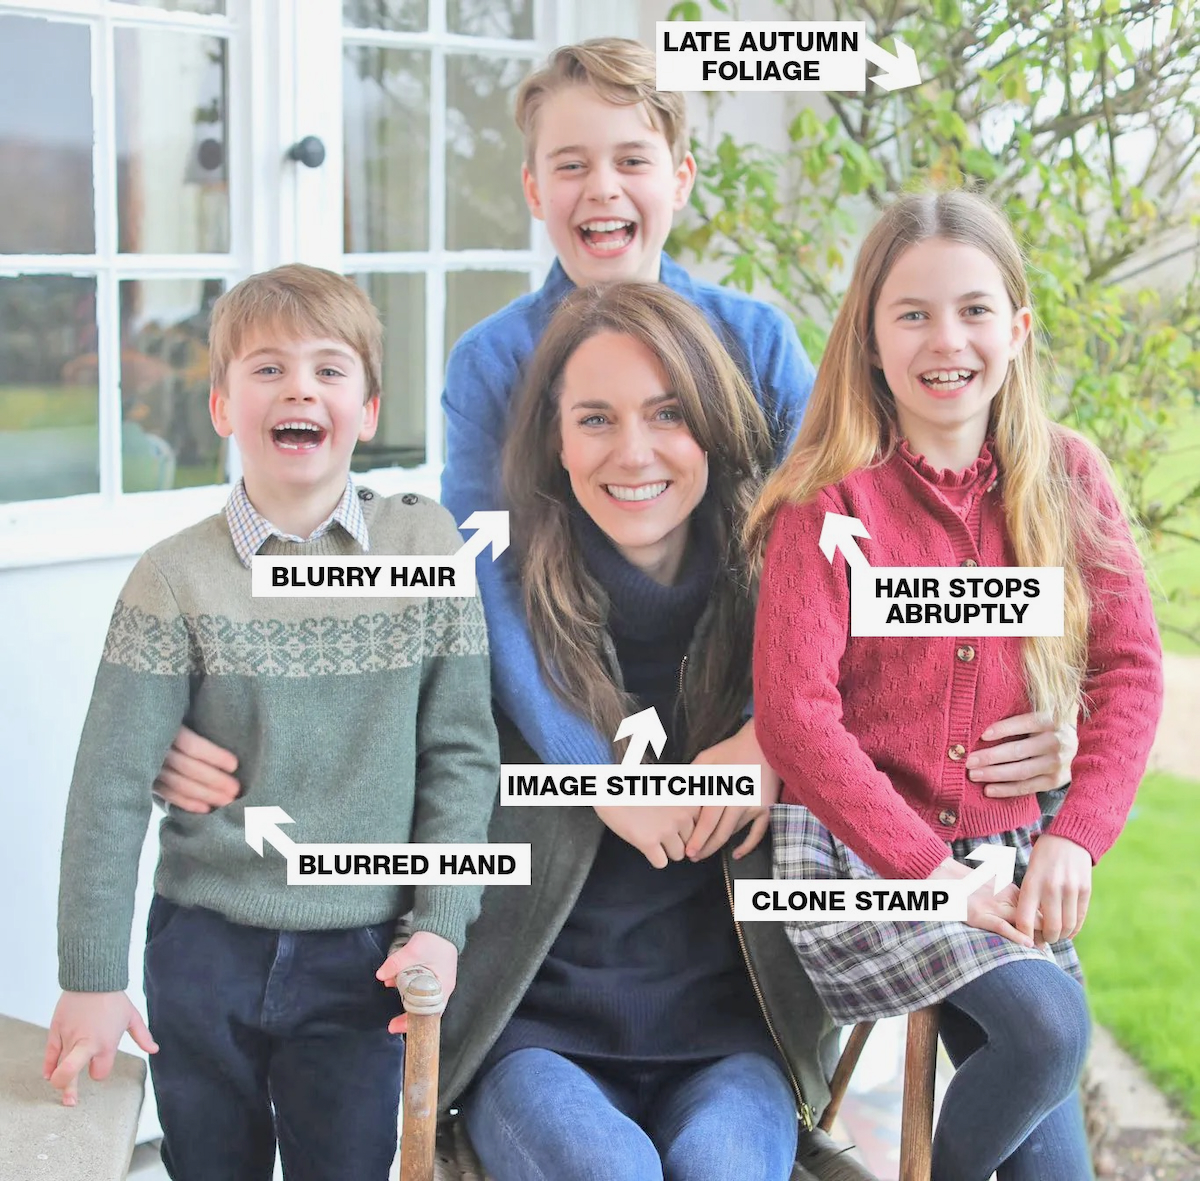
Just because I’m not particularly interested in debating the issue doesn’t mean it isn’t being discussed, especially in the media. Not too long ago, Kate Middleton, the Princess of Wales, was raked over the coals by the media for apparently making modifications to a photograph of herself and her children released for Mother’s Day.
She acknowledged that she had used Photoshop to make some modifications, but the press made it seem as though she had done so to fool the nation and, indeed, the whole world. About what, wasn’t really clear to me.
Here is that photograph, on which a photo-editing professional has marked some of the areas that were altered. You can judge for yourself whether you think she was wrong to do this. My own thought was that this was an incredibly embarrassing, unprofessional and unnecessary issue for the media to draw people’s attention to.
What Could Possibly Go Wrong?
I don’t see myself stopping the use of AI in my work, but I have developed a healthy appreciation of the fact that it’s important to cross-check and scrutinize its results. AI is a very different animal from the software we’ve been using for decades.
In traditional software development, the programmer did the thinking, and the computer did the executing. With artificial intelligence, humans still create the underlying technology, but rather than simply executing predetermined instructions, AI can interpret, reason, solve problems and make decisions on its own.
And that’s where some of my concerns begin. Do AI systems always make the best decisions? Are the solutions they come up with always accurate and truthful? This is when things can go wrong. Good old-fashioned, “makin’ things up”.
So, here’s a question for you. Did you notice any mistakes or misrepresentations in my edited “Stagecoach”photographs? There was one obvious one that you might have picked up. In all fairness, there is no way you could’ve figured out the others.
Let’s Have a Little Fun With This
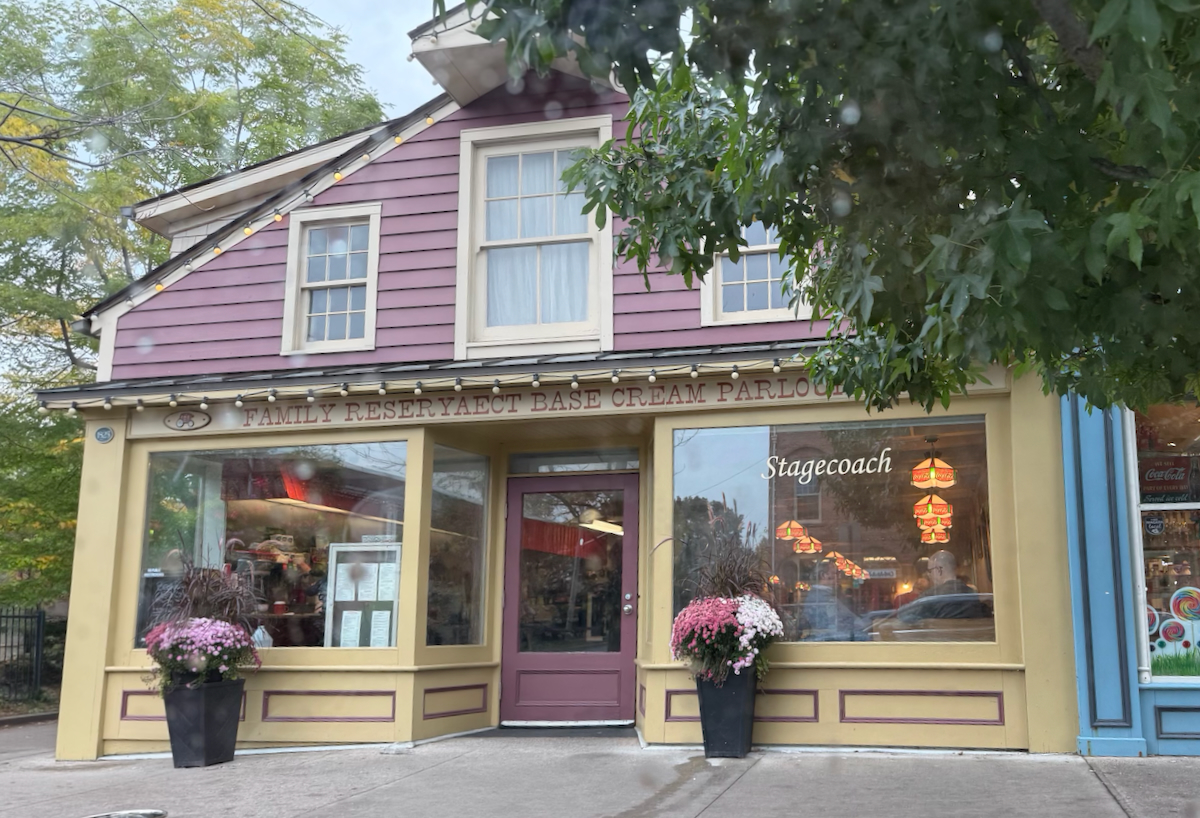
We are going to search for misrepresentations in the revised photos. First, I’m going to show you another grouping of three photographs – the original, my modified version and finally, the third which was modified using Reframe.
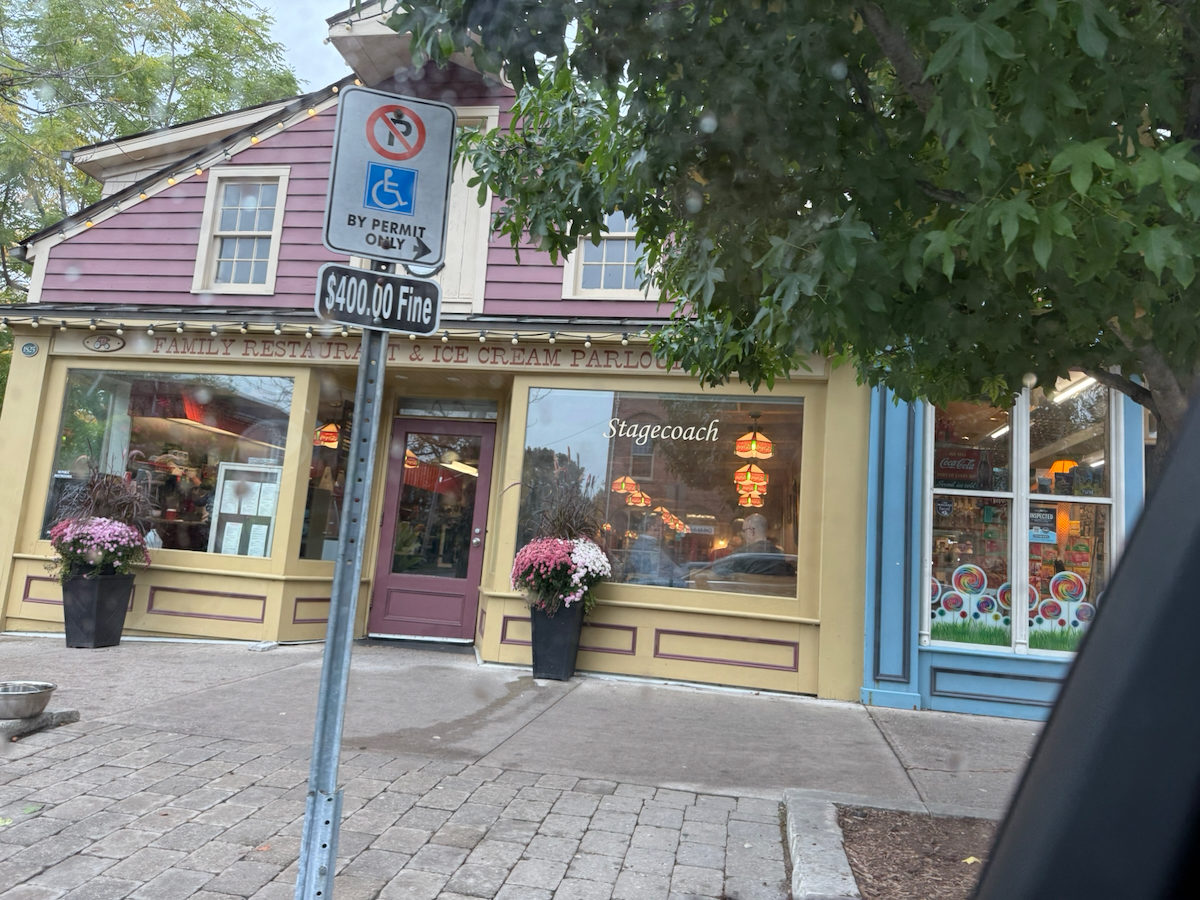
The following second group of photographs comes from Google Maps have not been modified in any way, and will be the baseline for the search for irregularities in my edited photos. The first is a photograph taken by an individual, while the other two are images from Google Maps Street View. Let the search for irregularities begin! Have a look back and forth between the two groupings and see if you can identify the inaccuracies.
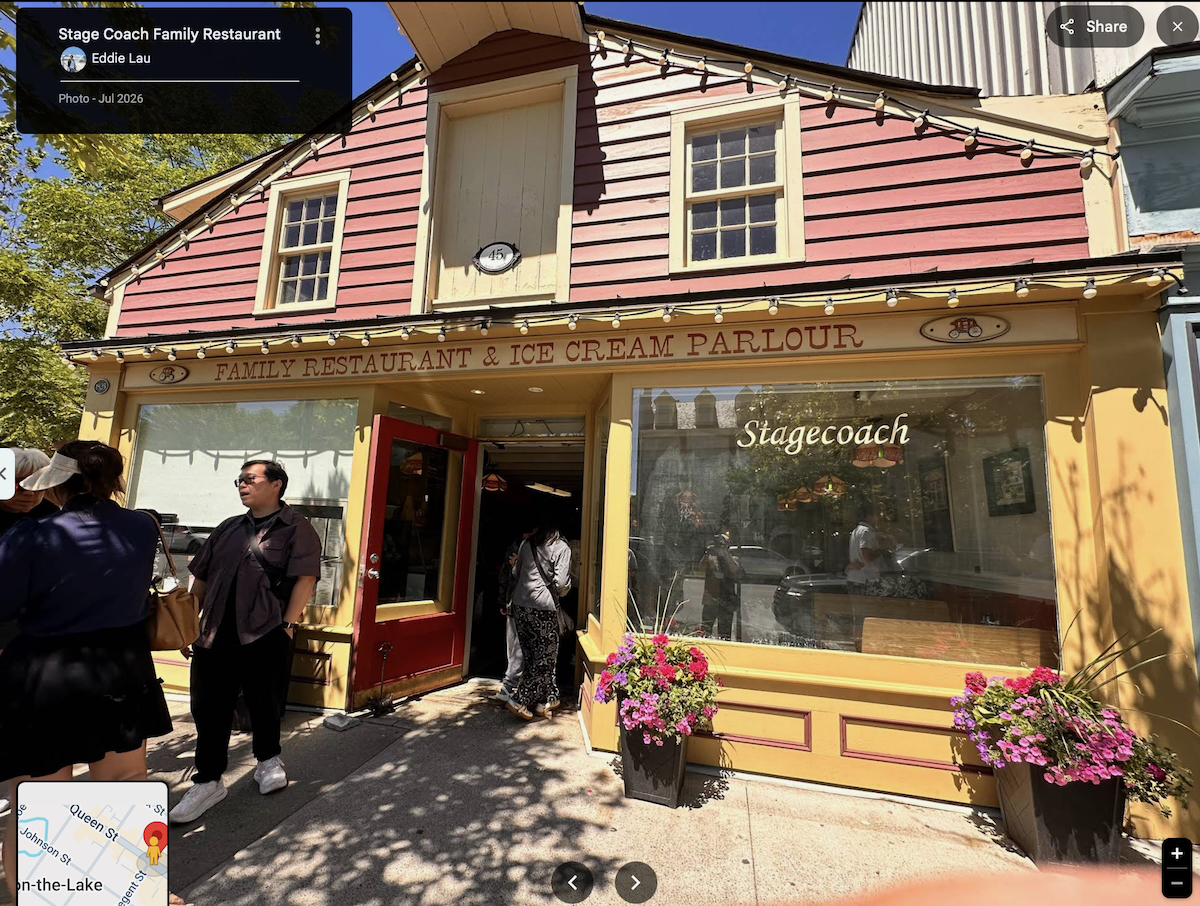
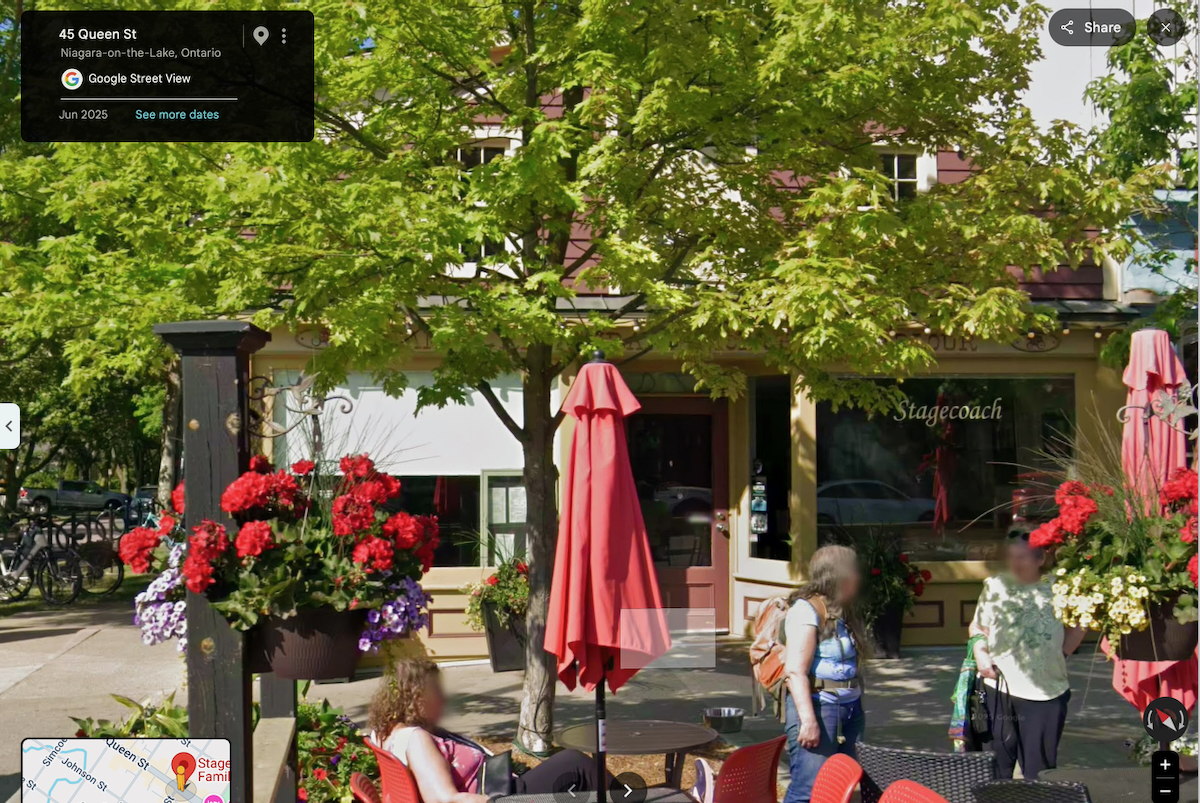
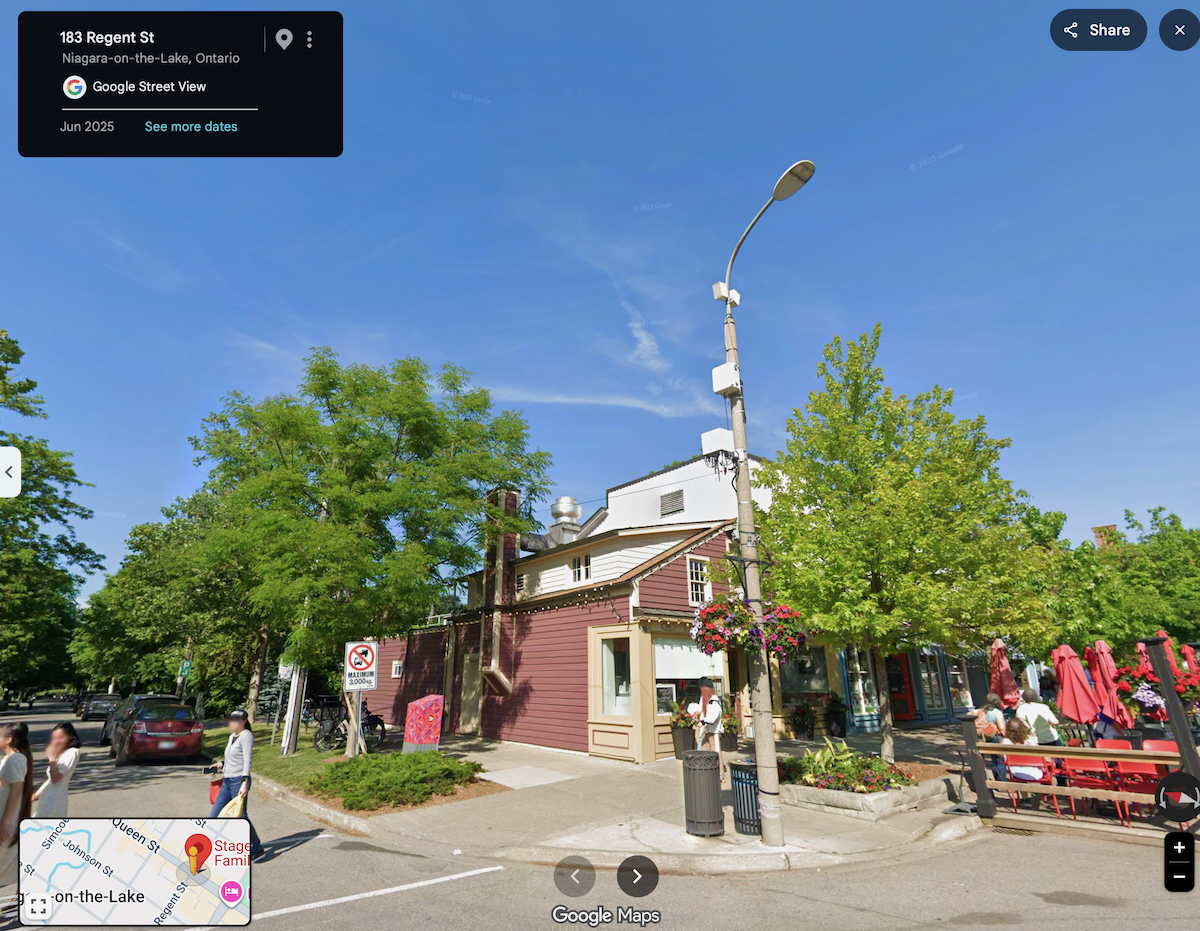
I suppose the lesson here is that you must always remember that AI is essentially making an educated guess about what lies behind objects that are about to be removed or what might exist outside the area originally captured in a photograph. It currently doesn’t have any more understanding or knowledge about the situation than you do.
The Inaccuracies
The first inaccuracy I was able to identify was the insertion of a window behind the spot where the removed sign had been covering the building. It’s a very good-looking substitution, for sure. But even I was able to figure out that there wasn’t a window behind the sign, just yellow-painted wooden slats, which are clearly visible in the photograph taken by Eddie Lau.
Personally, I thought there was enough visual information available that the AI should have figured out that there was something in the old window frame other than a window.
In my modified image, a black cast-iron fence appears to the left of the building. In the Reframe image, the fence appears again, but considerably longer because of the change in perspective. It even appears to be covered in ivy.
However, when you look at the Google Street View images, you can see that no such fence exists. Again, an attractive and interesting substitution, but not an accurate reflection of the scene.
There are several black bicycle stands along the grassy area beside the restaurant, but no fence. I suppose another inaccuracy is that neither of the modified photographs gives you a very good sense that there’s a street running right alongside the building.
In fairness to AI, I could have asked ChatGPT to correct these mistakes with a simple prompt explaining what was actually there. AI chatbots typically don’t get terribly married to their mistakes!
Conclusion
Using AI and AI-assisted software to edit photographs is a great tool, and one that I will continue to use and fine-tune my skills with. But I think everyone who uses these tools needs to remain vigilant and make sure that inaccuracies don’t creep into the images they’re presenting. AI photo editing is neither inherently good nor bad … actually, that remains to be seen … It’s how we use it, and what we represent the resulting images to be, that matters.
AI-assisted photo editing is definitely a caveat emptor situation!